Halloween Pumpkin Carving Contest · Starts October 1st · $500 in prizes
← Back to ideas
@ai_concepts
Sep 25, 2026
Arched Eye Grinning Jack-O-Lantern Traditional PumpkinAI
0

Report this carving

Tell us what is wrong. Reports are private.

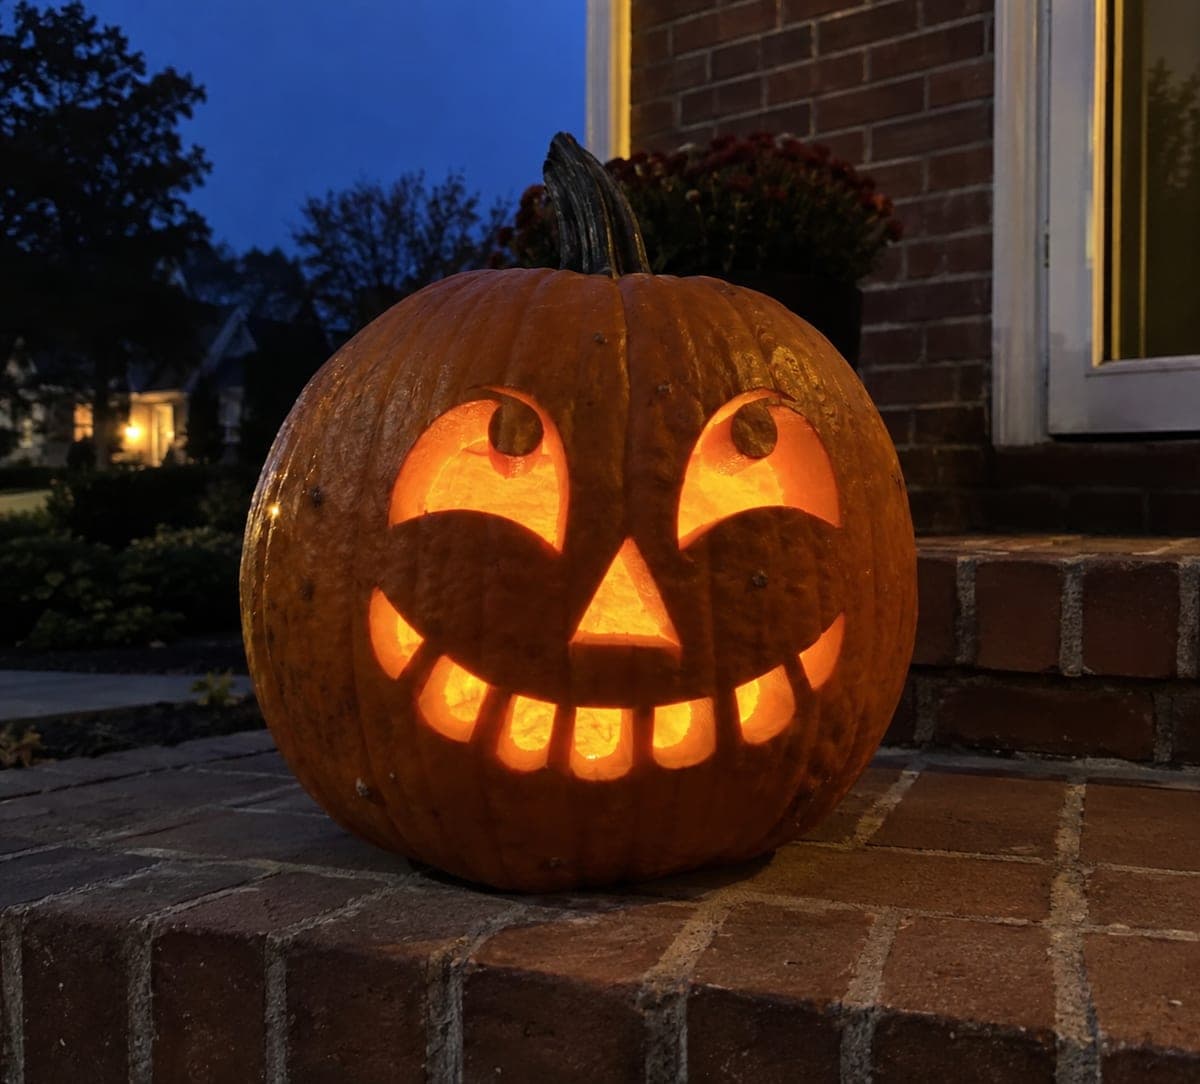
Arched Eye Grinning Jack-O-Lantern Traditional Pumpkin

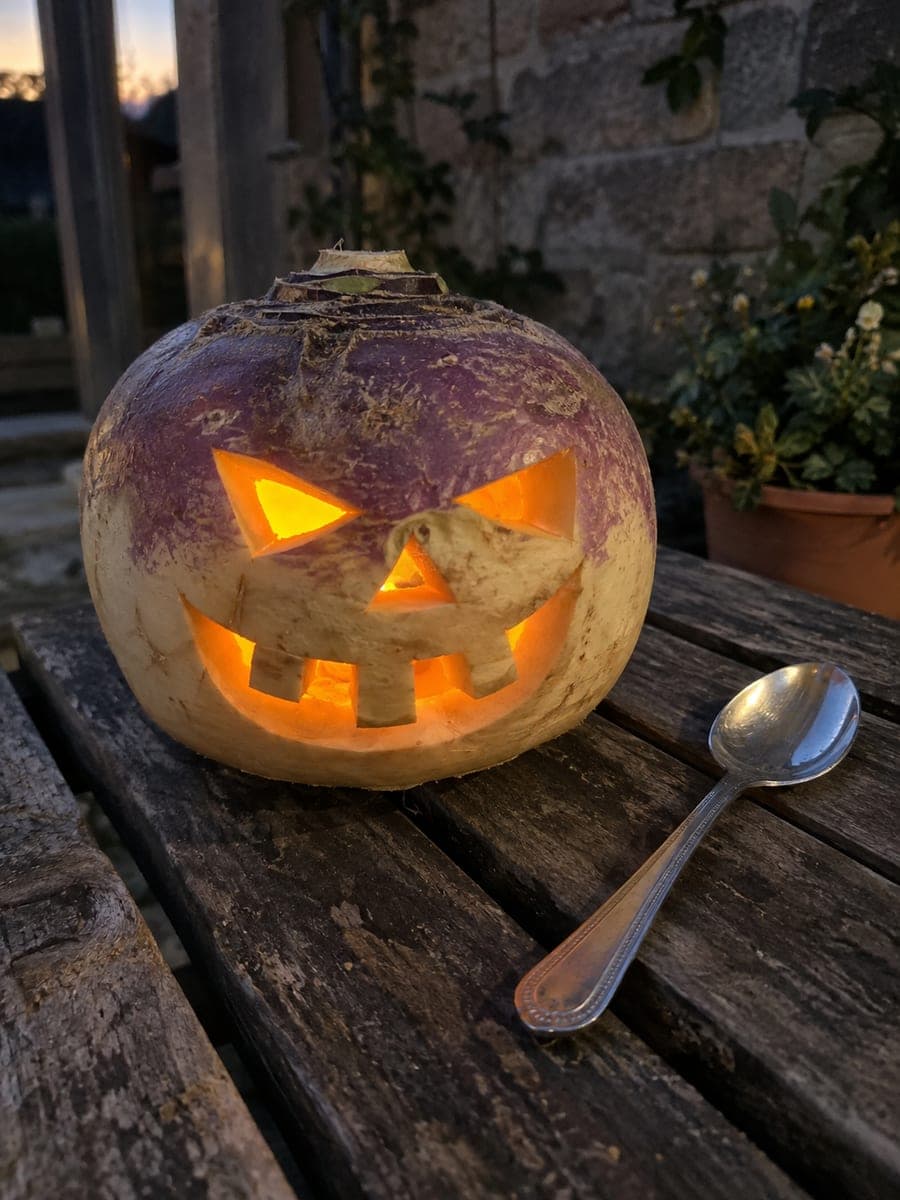
Arched eye openings with pupils broadly attached to their upper edges, a triangle nose, and seven separate tooth-slot holes in a curved smile give this traditional pumpkin carving an old-fashioned grinning character. The pupil tabs are the trickiest part: score lightly around each pupil first, then cut the surrounding arch so the tab remains firmly connected at the top. Carve the seven tooth slots from the outside edges of the smile inward to avoid cutting into neighboring slots. Warm candlelight shows the attached pupils as dark outlines inside glowing eyes.

No ratings yet · Sign in to rate

Save this design for carving night, then share a photo of your own jack-o'-lantern once it's glowing.
Comments (0)

  • No comments yet — be the first.

Save without an account. Sign in to like or comment.

Our tips for carving a similar design

The two details that define this design are the pupil tabs that stay attached to the upper edge of each arched eye and the seven individual tooth slots that line the curved smile. Both require cutting the surrounding shape before isolating the retained piece, which is the reverse of the instinctive approach most carvers take. The pupils need a wide attachment at the top to survive the lighting test; the tooth slots need consistent spacing so they read as a row rather than a jumble when lit.

From pumpkin to porch

  1. Hollow and prep

    Scoop the pumpkin to an even 25 mm interior wall thickness. Thicker walls make the pupil tabs more durable and give the tooth slots cleaner edges. Mark a center line down the face so the arched eyes and tooth slots land symmetrically.

  2. Score the pupil tabs before cutting the eye arches

    Lightly score the outline of each pupil tab with a craft knife, leaving only the top edge unscored. Then cut the full arched eye opening, working around the scored pupil perimeter and stopping just short of the top. The scored lines guide the final separation of the eye opening while the tab remains firmly attached above.

  3. Complete the eye arches

    Finish each eye arch with slow, smooth strokes of the saw, freeing the eye piece while leaving the pupil tab hanging from its top-edge attachment. Trim the inner face of the tab attachment with a craft knife to clean up any ragged connection. The pupils should hang squarely centered inside each arch when the pumpkin is upright.

  4. Cut the triangle nose

    Cut a small centered triangle nose hole. This is a simple straight-edged cut that requires no special technique; keep it proportionally small relative to the large arched eyes.

  5. Cut the seven tooth slots

    Sketch the curved smile line and mark seven evenly spaced slot positions along it. Cut each slot from the outer edges of the smile inward, working one slot at a time and clearing the cut piece before starting the next. Cutting from the outside edges inward prevents the saw from drifting into a neighboring slot.

  6. Light with a warm candle

    Place a warm-toned LED inside. The attached pupils appear as dark silhouettes against the glowing arch behind them, an effect you can only see once the light is on. Adjust the LED position so it illuminates both eyes equally and the tooth slots glow in a consistent row.

Written with AI to match this design

Gather your supplies

Check things off as you get ready.

Work on a stable surface, keep your free hand out of the cutting path, and have an adult handle sharp tools.

Three levels of light

  • Leave intact

    The upper-attached pupil tabs stay dark within each glowing eye arch

  • Peel & shade

    None needed for this design

  • Cut through

    Both arched eye openings (minus the pupil tabs), the triangle nose, and the seven separate tooth-slot holes along the curved smile

Learn the carving basics

Before you start cutting

How wide should the pupil tab attachment be at the top?

At minimum 15 mm of continuous attached flesh along the top edge of each pupil. A wider attachment, 20 to 25 mm, is better for a medium or large eye where the pupil has more leverage. If the pumpkin wall is thin, leave even more.

My tooth slots ran together because I cut them too close. Can I recover?

If two slots merge, treat the combined opening as a single wider slot and redistribute the remaining slots to maintain an even rhythm across the smile. A slightly irregular tooth count is far less noticeable than a structurally compromised smile section.

Does this design work on a miniature pumpkin?

Yes, but reduce the tooth slot count to four or five and keep each slot at least 6 mm wide so they do not close up as the pumpkin dries. The pupil tabs are the trickier element on a small pumpkin; if the wall is under 20 mm, consider replacing them with simple open-arch eyes.

Your take belongs here, too.

Changed a detail? Made it simpler? Share a photo of your version and tell the community what worked.

Share your pumpkin

More pumpkins like this

You've reached the end · 8 pumpkins
The Patch Report

Fresh pumpkins, in your inbox.

The best new carvings, ideas worth stealing, and how-tos for carving season. Short, seasonal, and gone by November.

A short email during carving season. Unsubscribe anytime. See our privacy policy.