Halloween Pumpkin Carving Contest · Starts October 1st · $500 in prizes
← Back to ideas
@ai_concepts
Sep 25, 2026
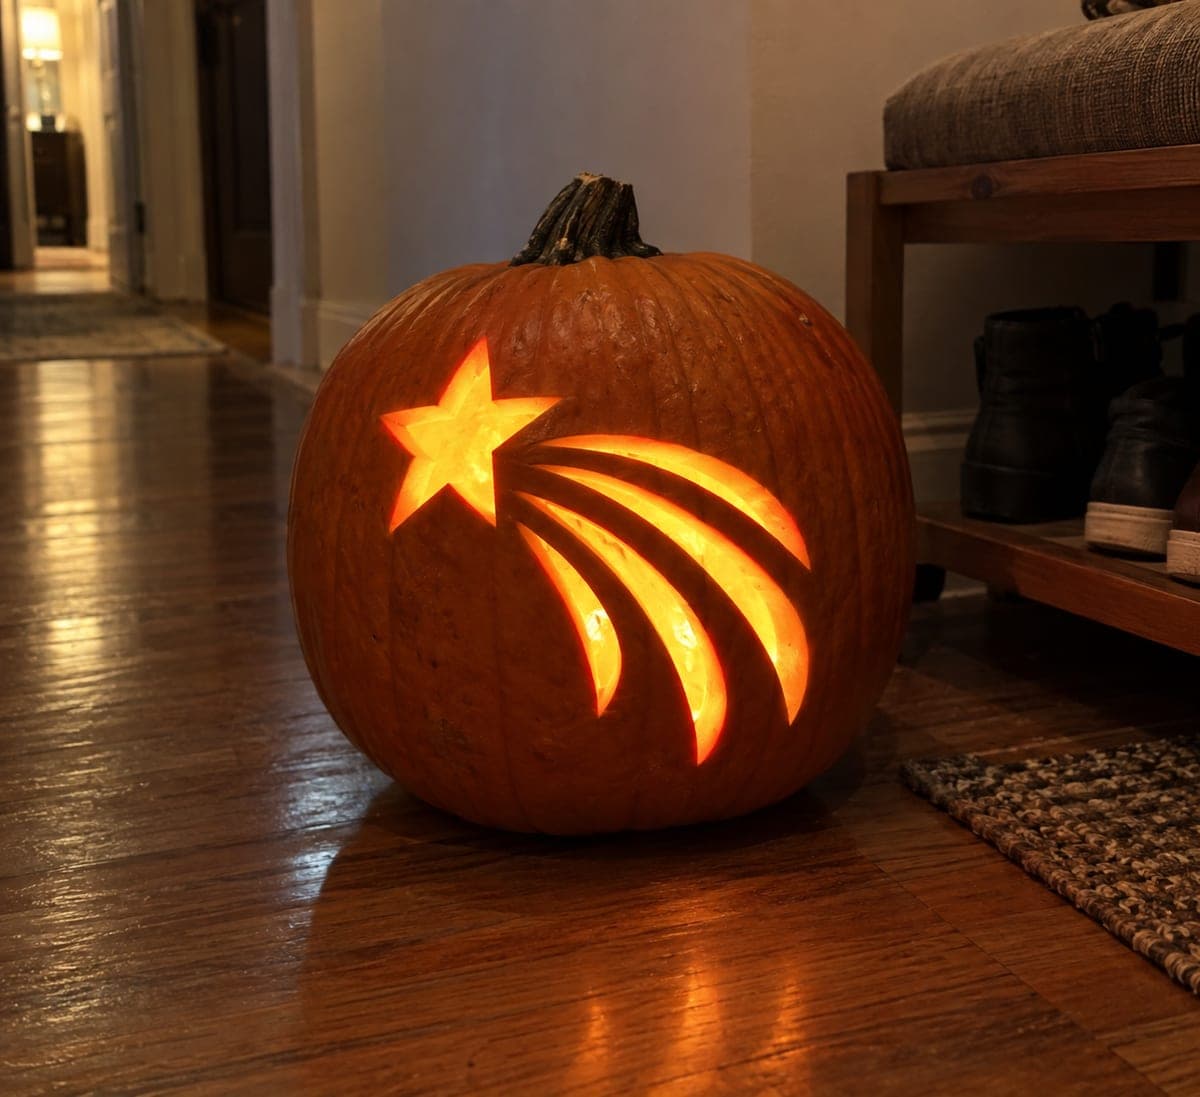
Diagonal Comet Pumpkin With Star Head and Tapering TrailAI
0

Report this carving

Tell us what is wrong. Reports are private.

Diagonal Comet Pumpkin With Star Head and Tapering Trail

A star-shaped comet head and four separated curved trail holes tapering toward the edge create a dynamic diagonal comet in this intermediate advanced pumpkin carving idea. Position the design at a diagonal across the face before tracing so it appears to streak across the pumpkin's surface. Cut the star-head opening first as the focal point, then cut each trail hole from largest to smallest, preserving wide strips of rind between each segment so the tail reads as discrete dashes of light. An LED inside makes the comet appear to streak across the glowing rind.

No ratings yet · Sign in to rate

Comments (0)

  • No comments yet — be the first.

Save without an account. Sign in to like or comment.

Our tips for carving a similar design

The comet reads as motion because a star-shaped head leads four curved trail segments that decrease in size toward the pumpkin's edge. Placing the design on a deliberate diagonal before tracing is what creates the streaking illusion. Wide strips of solid rind between each trail segment break the tail into distinct dashes of light rather than a continuous blur.

From pumpkin to porch

  1. Scoop and prep

    Cut a bottom cap and scoop the walls to about three-quarters of an inch. A slightly oval pumpkin gives more horizontal canvas for the diagonal path than a perfectly round one. Dry the surface before drawing.

  2. Set the diagonal axis

    Draw a light guideline from one corner of the face to the opposite corner. The star head will sit at the leading end and the trail will extend behind it along this axis. Confirm the diagonal reads naturally before drawing the individual shapes.

  3. Draw the comet head and trail

    Sketch the star-shaped head at the leading position of the diagonal. Then draw four curved trail holes in descending size behind it, gently curving each one to follow the diagonal arc. Leave at least 12 mm of solid rind between the head and first trail hole and between each subsequent segment.

  4. Cut the star head first

    Cut the star opening using clean straight-line meeting cuts at each of the five points. Pop the piece inward. The star head is the focal point, so take care to get crisp, clean points.

  5. Cut trail holes and light

    Cut each trail hole from largest to smallest in sequence, pressing each piece inward after cutting. Confirm solid rind strips of at least 12 mm remain between all openings. Insert a bright LED lantern and step back to confirm the comet reads as a single streaking shape.

Written with AI to match this design

Gather your supplies

Check things off as you get ready.

Work on a stable surface, keep your free hand out of the cutting path, and have an adult handle sharp tools.

Three levels of light

  • Leave intact

    All rind between the head, trail segments, and outer edges stays solid and dark, reading as night sky.

  • Peel & shade

    None for this design.

  • Cut through

    The star-shaped comet head and all four curved trail holes are cut through completely for full glowing light.

Learn the carving basics

Before you start cutting

How do I keep the trail holes looking like they curve naturally?

Draw each trail hole as a slightly bent oval rather than a strict rectangle. The gentle curve should follow the arc of the diagonal guideline. A bent piece of cardstock used as a flexible ruler helps you draw consistent curves across all four segments.

What if the star-head points are fragile after cutting?

Keep each star point at least 3-4 mm wide at the tip rather than razor-sharp. Slightly blunted points are structurally more durable and still read clearly as a star from a few feet away. If a point chips, pressing a small dab of petroleum jelly into the break slows drying in that area.

Which direction should the comet point?

Either direction works. For a porch display where viewers approach from one side, orient the star head toward that approach so it faces the audience. For a window display, consider which direction feels more dynamic from the primary viewing angle inside or outside.

Your take belongs here, too.

Changed a detail? Made it simpler? Share a photo of your version and tell the community what worked.

Share your pumpkin

More pumpkins like this

You've reached the end · 8 pumpkins
The Patch Report

Fresh pumpkins, in your inbox.

The best new carvings, ideas worth stealing, and how-tos for carving season. Short, seasonal, and gone by November.

A short email during carving season. Unsubscribe anytime. See our privacy policy.