Halloween Pumpkin Carving Contest · Starts October 1st · $500 in prizes
← Back to ideas
@ai_concepts
Jul 23, 2026
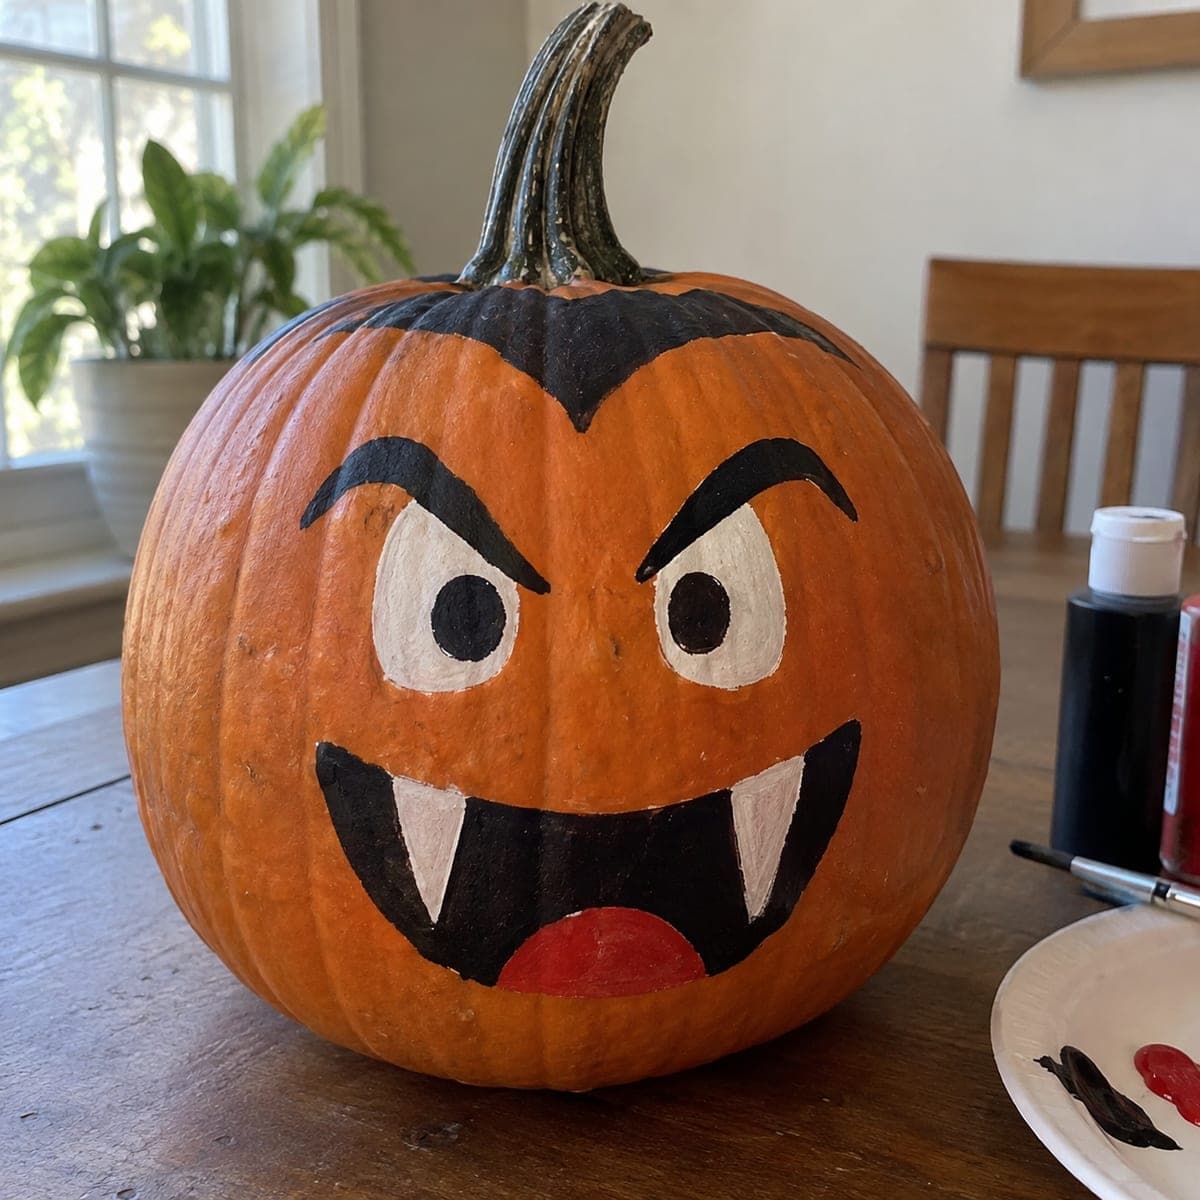
Goofy Vampire Face Painted No-Carve PumpkinAI
0

Goofy Vampire Face Painted No-Carve Pumpkin

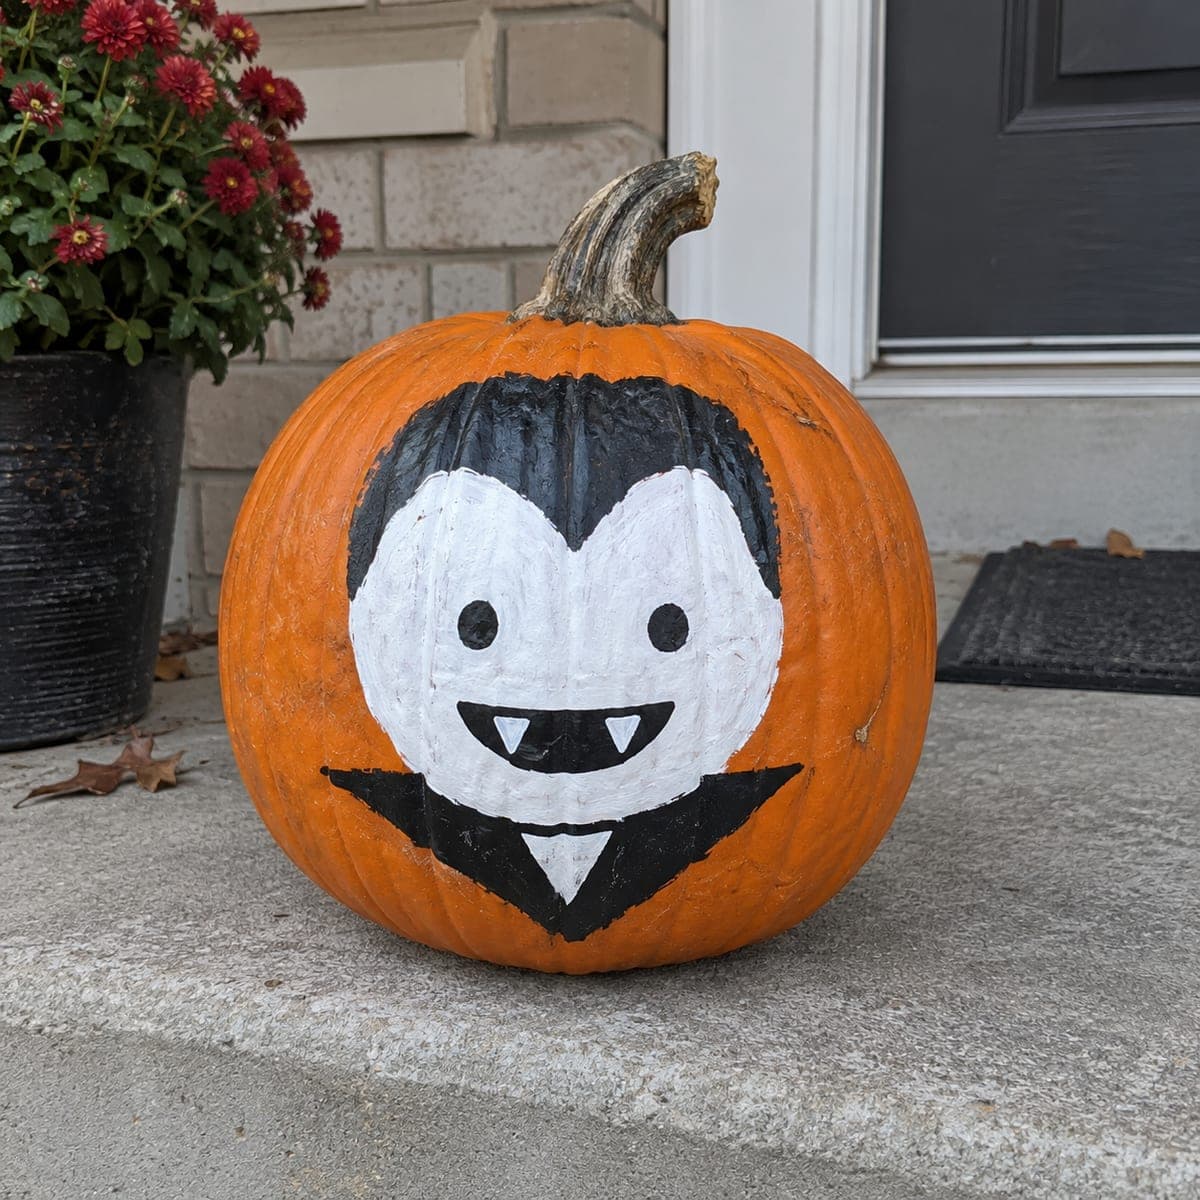
A mischievous vampire face painted on a whole pumpkin, complete with angled black brows, wide white eyes, a slick black hairline, and a fanged grin over a red tongue. No knives needed, just black, white, and red acrylic and a fine brush for the fang points, so kids can help with the big shapes. Chalk the face on first to balance the features, and seal it with spray acrylic if it will sit outside.

This is an AI-generated concept image: a realistic, carvable design idea rather than a photo of a finished carve. AI concepts are always labeled and sit out the leaderboard and the contest.

No ratings yet · Sign in to rate

Comments (0)

  • No comments yet — be the first.

Save without an account. Sign in to like or comment.

Our tips for carving a similar design

The core trick here is layering flat acrylic shapes so a friendly vampire reads clearly from across the porch. You block in the black hairline, angled brows, and open mouth first, drop in white eyes and fangs, then finish with a red tongue. Because nothing is cut, the whole thing stays sturdy and kids can safely help with the big shapes.

Written by PumpkinCarvingIdeas.com, inspired by the image above. These are our suggestions, not instructions from the uploader. This approach to the AI concept has not been tested on a real pumpkin.

From pumpkin to porch

  1. Clean and chalk the layout

    Wipe the pumpkin with a damp cloth and let it dry so paint grips well. Use white chalk to sketch the widow's peak hairline, two angled brows, two eyes, the wide grin, and the tongue. Step back and check that the features sit level and balanced before any paint touches the surface. Chalk wipes off easily, so redraw until it looks right.

  2. Paint the black shapes first

    Load a medium flat brush with black acrylic and fill the hairline across the top, both slanted brows, and the open mouth outline. Keep edges crisp by pulling the brush toward the center of each shape. Let this layer dry fully before adding anything on top, since black bleeds into wet colors. Two thin coats look cleaner than one thick one.

  3. Add the white eyes and fangs

    Fill the two eye ovals with white acrylic and let them dry. Switch to a fine detail brush for the two pointed fangs hanging into the mouth, keeping the points narrow but not razor thin so they stay neat. Once the white is dry, dot in the black pupils and let them set. Rinse the brush well between colors to avoid muddy edges.

  4. Drop in the red tongue

    Paint the rounded red tongue at the bottom of the mouth, tucked between the fangs. Keep it inside the black so a thin dark outline still frames it. A second coat gives the red a solid, glossy pop. Let everything cure for at least an hour.

  5. Seal and display

    If the pumpkin will sit outside, mist it with a light coat of clear spray acrylic in a ventilated spot and let it dry. Set it on a porch or shelf where the face catches good light. For a nighttime look, stand a battery LED puck beside it rather than inside, since the pumpkin is not hollowed. Snap your photo in soft daylight to keep the colors true.

Gather your supplies

Check things off as you get ready.

Work on a stable surface, keep your free hand out of the cutting path, and have an adult handle sharp tools.

Three levels of light

  • Leave intact

    The orange face and all the plain pumpkin skin stay untouched as the warm background.

  • Peel & shade

    This is a paint design, so there is no peeled glow; if you wanted one, you could lightly shave the eye ovals before painting white over them.

  • Cut through

    Nothing is cut on this no-carve version; for a lit twist you could cut only the mouth opening last and back it with an LED.

Learn the carving basics

Before you start cutting

Do I need to carve anything for this look?

No, this is a fully painted design, which is why it holds up so well and is safe for kids to help with. You only need paint, brushes, and chalk. If you later want a glow, cut just the mouth and drop in an LED, but the painted version stands on its own.

How do I keep the fang points looking sharp?

Use a fine detail brush and paint the fangs as narrow triangles, not needle thin, so the edges stay clean and do not smear. Let the surrounding black dry completely first so the white does not pick up dark streaks. Two thin coats of white give the brightest, crispest points.

Will the paint survive outside?

Acrylic handles light weather but can dull or chip in rain and heat. A quick coat of clear spray acrylic sealer locks the colors in and adds water resistance. Even sealed, a real pumpkin softens over time, so display it in a shaded spot and expect a week or two of good looks.

Your take belongs here, too.

Changed a detail? Made it simpler? Share a photo of your version and tell the community what worked.

Share your pumpkin

More pumpkins like this

You've reached the end · 8 pumpkins
The Patch Report

Fresh pumpkins, in your inbox.

The best new carvings, ideas worth stealing, and how-tos for carving season. Short, seasonal, and gone by November.

A short email during carving season. Unsubscribe anytime. See our privacy policy.