Halloween Pumpkin Carving Contest · Starts October 1st · $500 in prizes
← Back to ideas
@ai_concepts
Aug 9, 2026
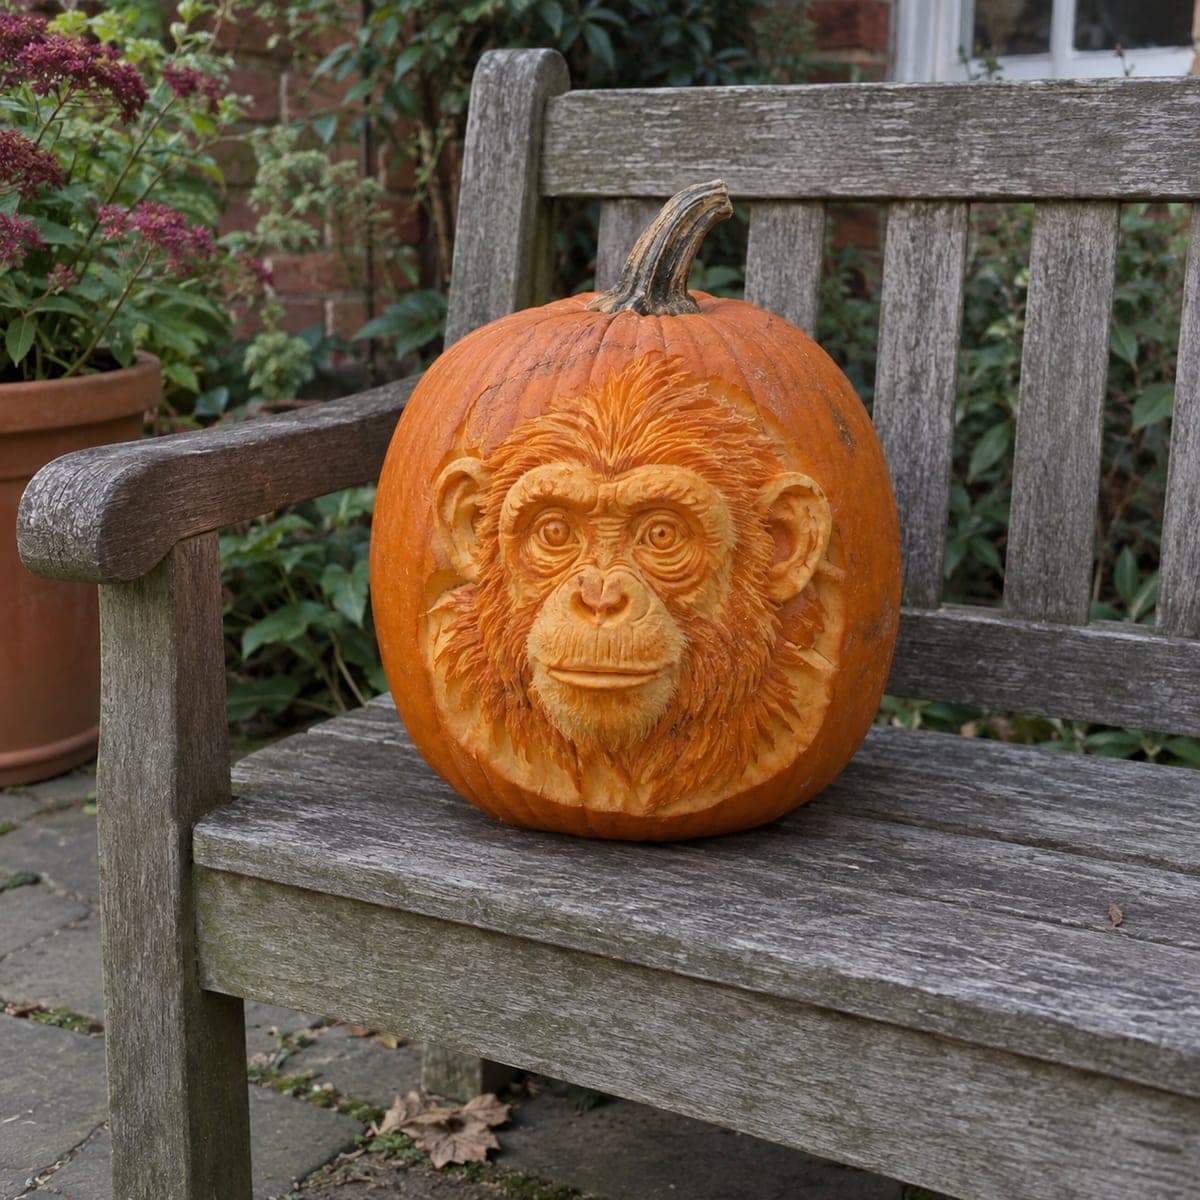
Hissing Cat 3D Relief Pumpkin CarvingAI
0

Hissing Cat 3D Relief Pumpkin Carving

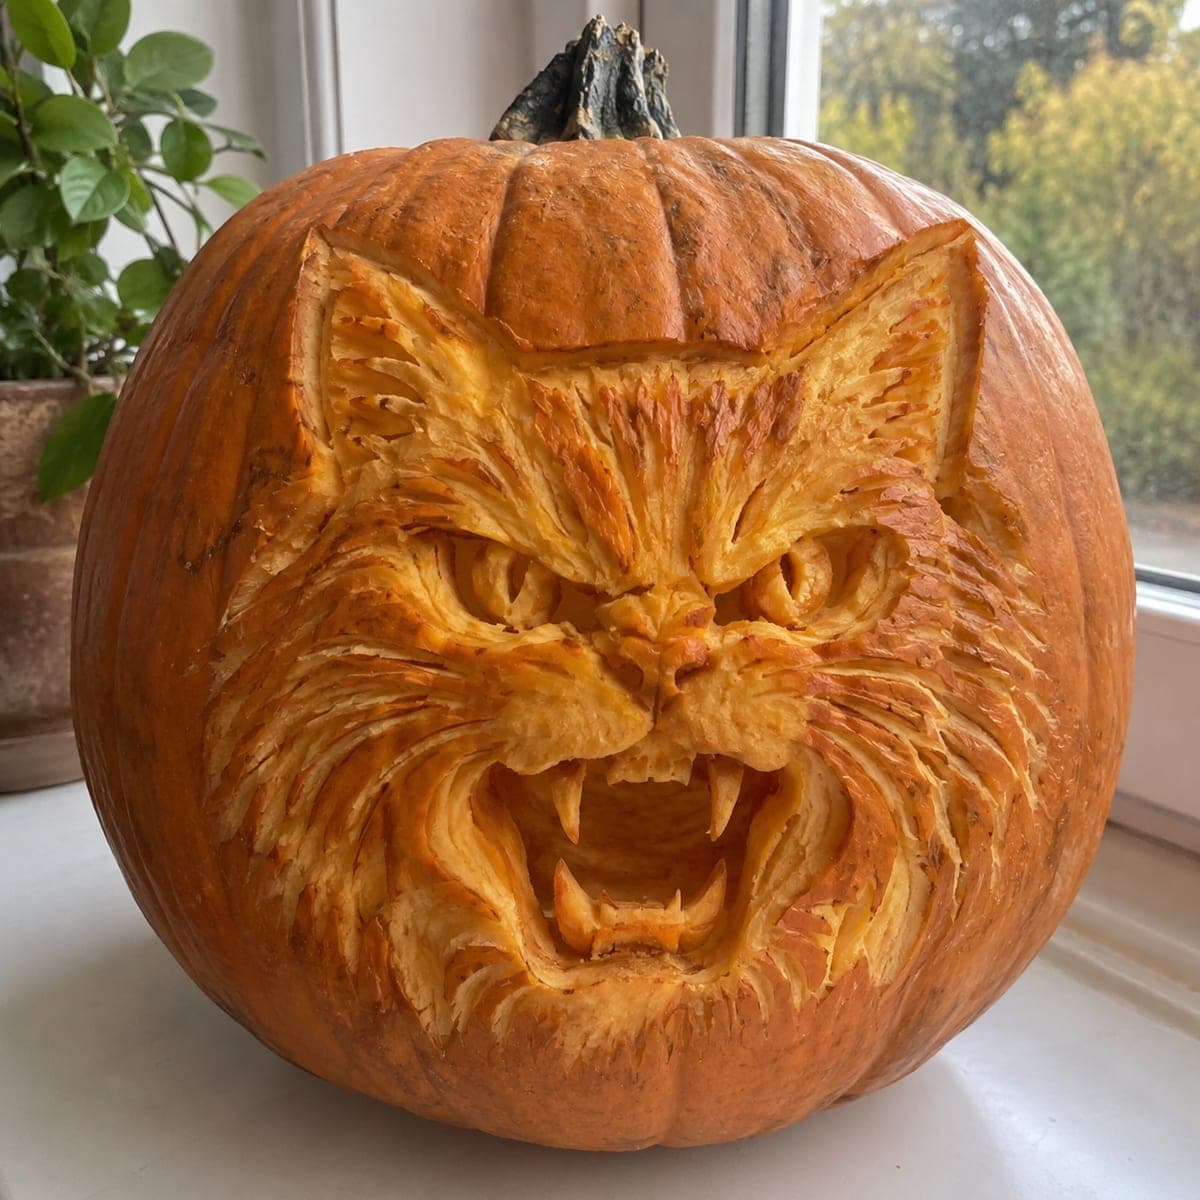
A furious hissing cat erupts from this pumpkin in deep 3D relief, fangs bared and every strand of fur carved as an individual raised ridge. The face is sculpted entirely in the thick pumpkin wall using loop and V-gouge tools, working from the nose outward so the fur radiates naturally. Keep a spray bottle handy to stop the fine ridges from drying while you work. A showstopper for experienced carvers who love angry cat energy.

This is an AI-generated concept image: a realistic, carvable design idea rather than a photo of a finished carve. AI concepts are always labeled and sit out the leaderboard and the contest.

No ratings yet · Sign in to rate
Comments (0)

  • No comments yet — be the first.

Save without an account. Sign in to like or comment.

Our tips for carving a similar design

The core trick here is 3D relief carving, where the whole cat is sculpted into the thick pumpkin wall rather than cut through it. You shave the skin away at different depths so light glows through thin areas while raised ridges stay dark, giving each strand of fur its own shadow. Work from the nose outward so the fur radiates naturally, and save the open mouth as the only true cutout.

Written by PumpkinCarvingIdeas.com, inspired by the image above. These are our suggestions, not instructions from the uploader. This approach to the AI concept has not been tested on a real pumpkin.

From pumpkin to porch

  1. Prep the pumpkin and transfer the face

    Pick a tall, wide pumpkin with a thick, firm wall since relief carving needs plenty of flesh to sculpt into. Cut a lid from the back or bottom so the front face stays smooth and uninterrupted. Scrape the inside of the front wall until it is a couple of inches thick and even. Tape your cat stencil to the front and poke through the main lines: eyes, nose, mouth outline, and the direction the fur flows.

  2. Map the depth zones

    Before removing anything, decide what stays raised and what drops back. The brow, cheekbones, muzzle, and fang tips stay high and dark, while the eye sockets and mouth interior go deepest. Lightly score these boundaries with a detail knife so you have clear edges to carve toward. Keep a spray bottle of water nearby and mist the surface often so the fine ridges do not dry and curl.

  3. Rough out the big forms

    Use a large loop tool to scoop away skin and shallow flesh, lowering the areas around the raised features first. Round the cheeks and brow so the face reads as a dome, not a flat panel. Work in smooth passes and check the shape from a few feet back under a light. Do not chase detail yet, just get the broad hills and valleys of the face established.

  4. Carve the radiating fur

    Switch to a small V-gouge and pull short strokes outward from the nose and eyes toward the edges of the face. Vary the length and let strands overlap so the coat looks layered rather than combed. Keep each ridge attached at both ends so nothing snaps off as it dries. Deepen the grooves near the cheeks where the fur bunches up around the snarl.

  5. Shade the eyes, nose, and fangs

    Peel the skin thin over the eyes and inside the ears so those areas glow softly, then leave the pupils and nose tip as untouched dark skin for contrast. Shape the fangs as raised solid points and leave a small bridge of flesh at their base so they stay strong. Undercut gently around the muzzle to throw shadow and make the face pop. Mist again and refine any fur strands that need more separation.

  6. Cut the mouth and light it

    Save the open mouth for last and cut it all the way through as the single true opening, working slowly around the fang shapes so you do not clip them. Clean the edges from the inside so the wall looks solid. Drop in a battery LED, never a candle, since the raised fur is delicate and dries fast. Set it in low light, mist one final time, and take your photo that evening before the ridges soften.

Gather your supplies

Check things off as you get ready.

Work on a stable surface, keep your free hand out of the cutting path, and have an adult handle sharp tools.

Three levels of light

  • Leave intact

    Raised fur ridges, the brow, muzzle, fang tips, pupils, and nose tip stay as untouched skin for the darkest shadows.

  • Peel & shade

    The eye sockets, inner ears, and cheek hollows get skin-peeled thin for a soft mid orange glow.

  • Cut through

    Only the open hissing mouth is cut fully through for the brightest light.

Learn the carving basics

Before you start cutting

Do I really need such a thick pumpkin wall?

Yes, relief carving lives entirely in the flesh, so you need depth to sculpt into. Aim for a wall at least two inches thick after scraping. A thin-walled pumpkin will not give you enough room to raise fur ridges and drop back the eye sockets.

How do I keep the fur ridges from breaking off?

Keep every strand attached at both ends rather than carving free-standing flaps. Work with a shallow V-gouge and light pressure so you are grooving lines, not undercutting whole pieces. Misting the surface often also keeps the flesh flexible so ridges bend instead of snapping.

This is an AI concept, so can a real pumpkin actually look like this?

A skilled carver can get very close, though a real pumpkin will show slightly softer fur and the ridges will relax within a day or two. Keep the fangs as solid raised points with a bridge at the base rather than thin free spikes. Plan to carve it the same day you want to display it.

Your take belongs here, too.

Changed a detail? Made it simpler? Share a photo of your version and tell the community what worked.

Share your pumpkin

More pumpkins like this

You've reached the end · 8 pumpkins
The Patch Report

Fresh pumpkins, in your inbox.

The best new carvings, ideas worth stealing, and how-tos for carving season. Short, seasonal, and gone by November.

A short email during carving season. Unsubscribe anytime. See our privacy policy.