Halloween Pumpkin Carving Contest · Starts October 1st · $500 in prizes
← Back to ideas
@ai_concepts
Jul 23, 2026
Leopard Face Portrait Cutout Pumpkin GlowingAI
0

Leopard Face Portrait Cutout Pumpkin Glowing

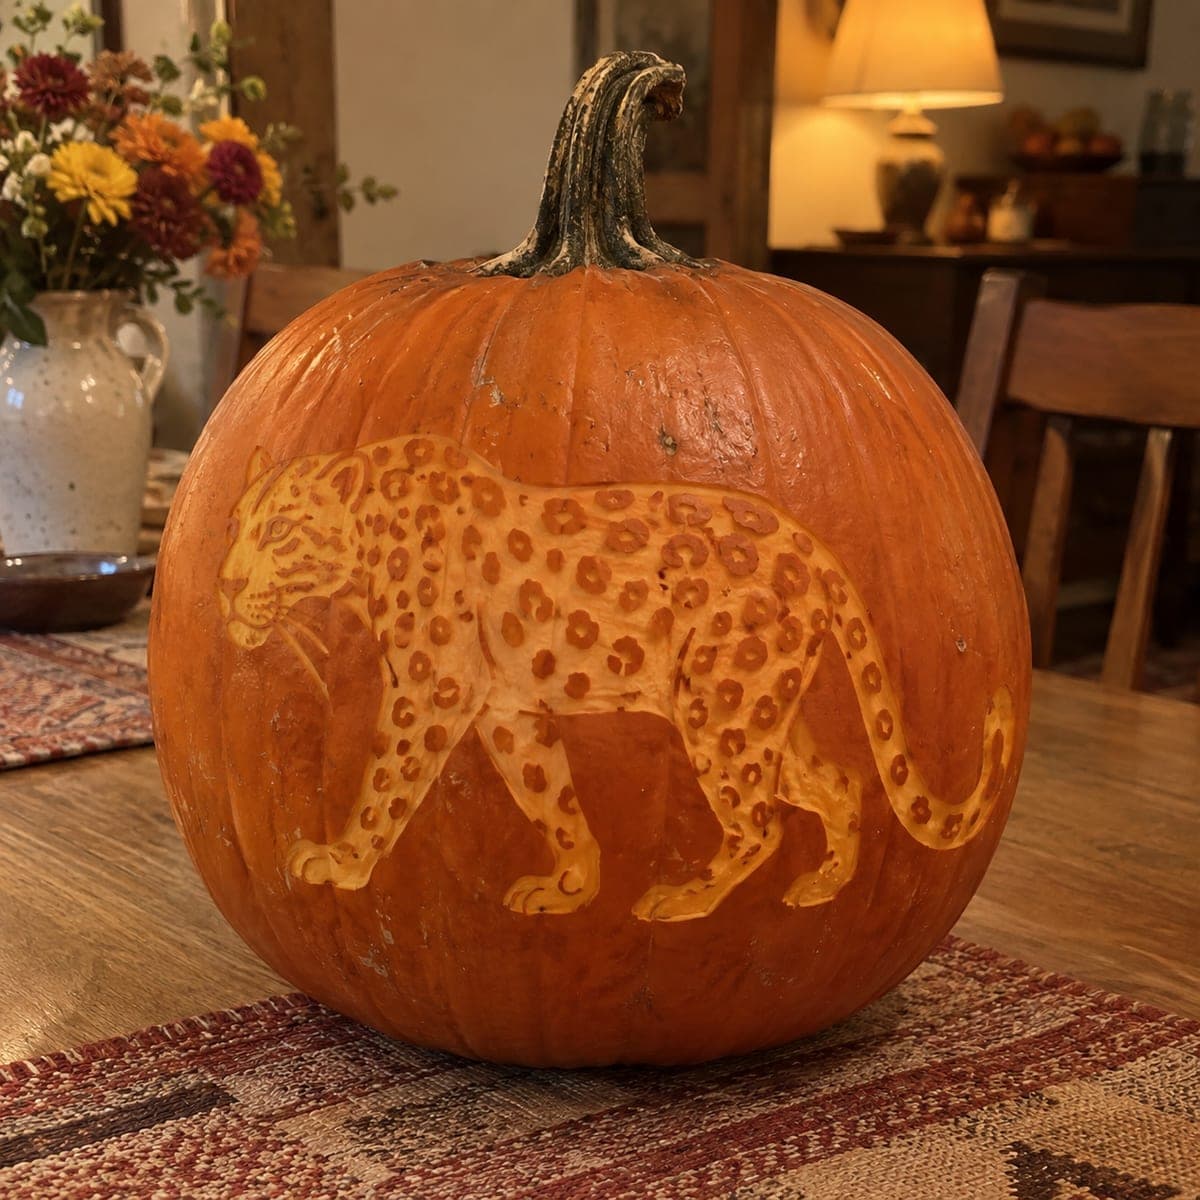
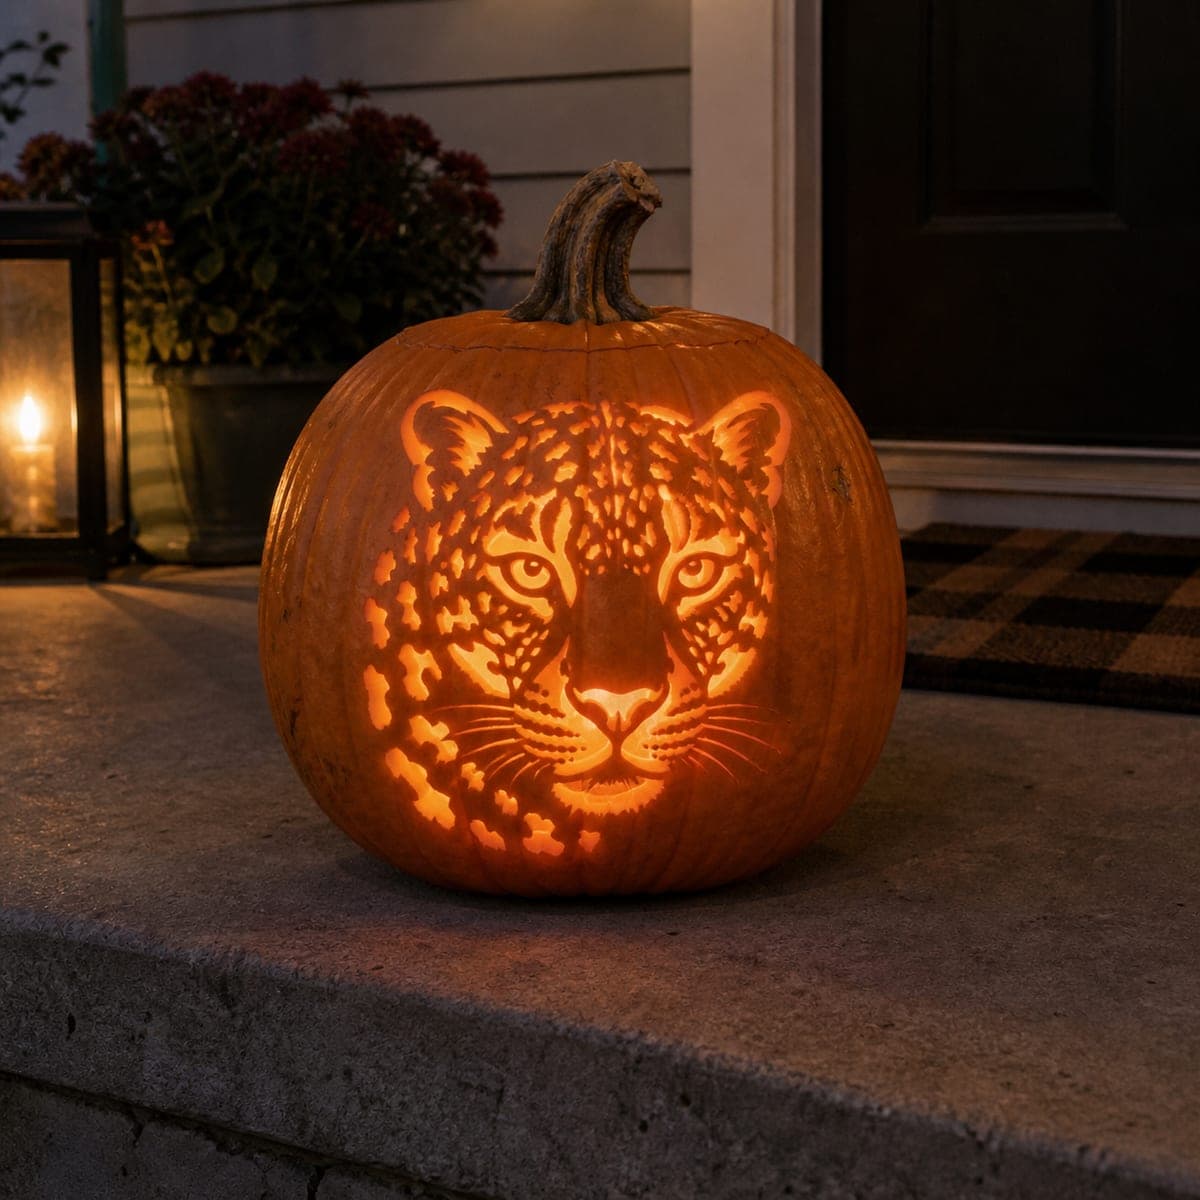
A close-up leopard face with prominent cheek spots, intense forward-facing eyes, and visible whisker dots is carved through this pumpkin in fine detail, the cat's gaze made dramatic by warm candlelight. The spots and fur texture are cut as individual shapes connected by thin bridges of pumpkin skin, so planning the pattern carefully to include enough attachment points is essential. Use a loop-hole saw and a fine jab-saw for the whisker-dot punctures, and carve the large eye shapes last so the face retains its symmetry throughout.

This is an AI-generated concept image: a realistic, carvable design idea rather than a photo of a finished carve. AI concepts are always labeled and sit out the leaderboard and the contest.

No ratings yet · Sign in to rate
Comments (0)

  • No comments yet — be the first.

Save without an account. Sign in to like or comment.

Our tips for carving a similar design

The core trick here is turning a leopard's spotted coat into a lattice of small cutouts held together by thin bridges of pumpkin skin, so the light reads as fur rather than one big hole. You could plan the pattern first so every spot cluster keeps enough attachment points, then work from the fine whisker dots outward and save the large eye openings for last to protect the symmetry of the face. Since this is a concept image, treat it as a target look you can build toward at your own pace.

Written by PumpkinCarvingIdeas.com, inspired by the image above. These are our suggestions, not instructions from the uploader. This approach to the AI concept has not been tested on a real pumpkin.

From pumpkin to porch

  1. Prep the pumpkin and mount the pattern

    Pick a tall, smooth pumpkin with a flat front panel so the face sits evenly. Cut a lid from the bottom or back rather than the top, which keeps the stem intact and makes the LED easy to swap. Scrape the inside wall behind the face down to about one inch so light passes through cleanly. Tape your leopard stencil firmly over the front and smooth out any wrinkles.

  2. Transfer the full pattern before any cutting

    Use a poker or transfer tool to dot along every spot, whisker mark, and the eye outlines. Take your time and make sure each spot cluster shows the little skin bridges that will hold it in place. Peel the paper and step back to check that the dotted map still reads as a leopard face. Fixing gaps now is far easier than after you start cutting.

  3. Punch the whisker dots and fine detail

    Start with the smallest marks, the whisker-root dots and tiny fur flecks, using a fine jab saw or a drill-style poker. Working small details first keeps the surface strong while you have the most pumpkin to brace against. Twist gently and let the tool do the work so you do not blow out the thin walls between dots. Adults should handle all sharp tools throughout.

  4. Cut the spot clusters with bridges intact

    Move to the leopard's cheek and forehead spots, cutting each shape as its own opening. Leave the planned skin bridges uncut so neighboring spots stay connected and the pattern does not sag. A small loop or jab saw gives you the control needed for these curved shapes. Rotate the pumpkin instead of twisting your wrist into awkward angles.

  5. Open the eyes and nose last

    Save the large eye shapes and the nose for the end, since they remove the most material and can throw off symmetry if cut early. Carve one eye, then match the second to it in size and angle before opening it fully. Clean the edges with a paring tool so the gaze looks crisp and alert. Gently shave the back of the nose and muzzle for a softer glow if you want extra dimension.

  6. Light it and photograph

    Drop in a bright warm-white LED puck, never a candle, so the fine bridges do not scorch. Set it low and slightly forward to push light up through the eyes and spots. Shoot in near-dark on a step or porch to capture the warm glow like the reference look. Mist the cut edges with water and refrigerate between showings to keep the detail sharp.

Gather your supplies

Check things off as you get ready.

Work on a stable surface, keep your free hand out of the cutting path, and have an adult handle sharp tools.

Three levels of light

  • Leave intact

    The broad muzzle, forehead base, and outer face keep their skin dark to define the leopard's shape.

  • Peel & shade

    Shave the nose pad and muzzle shading thin for a soft dim orange that adds roundness to the face.

  • Cut through

    The eyes, spot clusters, and whisker dots cut fully through for the brightest points of light.

Learn the carving basics

Before you start cutting

How do I keep all those spots from falling out?

Plan skin bridges between every spot before you cut, and mark them on your pattern so you do not forget mid-carve. Keep each bridge at least a quarter inch wide near the edges of the design where the shell flexes most. If a bridge tears, a toothpick pushed through the back can splint it temporarily.

Why cut the eyes last?

The two large eye openings remove a lot of material and anchor the whole expression, so cutting them early makes it easy to lose symmetry as the shell shifts. Carve one, match the second to it, then open both fully. This keeps the leopard's forward gaze balanced.

This is an AI concept, so can a real pumpkin hold this much detail?

Yes, if you thin the wall behind the face and keep generous bridges between the small cutouts. A dense, thick-walled carving pumpkin holds fine work better than a thin field pumpkin. Expect it to take a couple of hours, and go slower through the whisker dots.

Your take belongs here, too.

Changed a detail? Made it simpler? Share a photo of your version and tell the community what worked.

Share your pumpkin

More pumpkins like this

You've reached the end · 8 pumpkins
The Patch Report

Fresh pumpkins, in your inbox.

The best new carvings, ideas worth stealing, and how-tos for carving season. Short, seasonal, and gone by November.

A short email during carving season. Unsubscribe anytime. See our privacy policy.