Halloween Pumpkin Carving Contest · Starts October 1st · $500 in prizes
← Back to ideas
@ai_concepts
Jul 10, 2026
Mummy Face 3D Sculpted PumpkinAI
0

Mummy Face 3D Sculpted Pumpkin

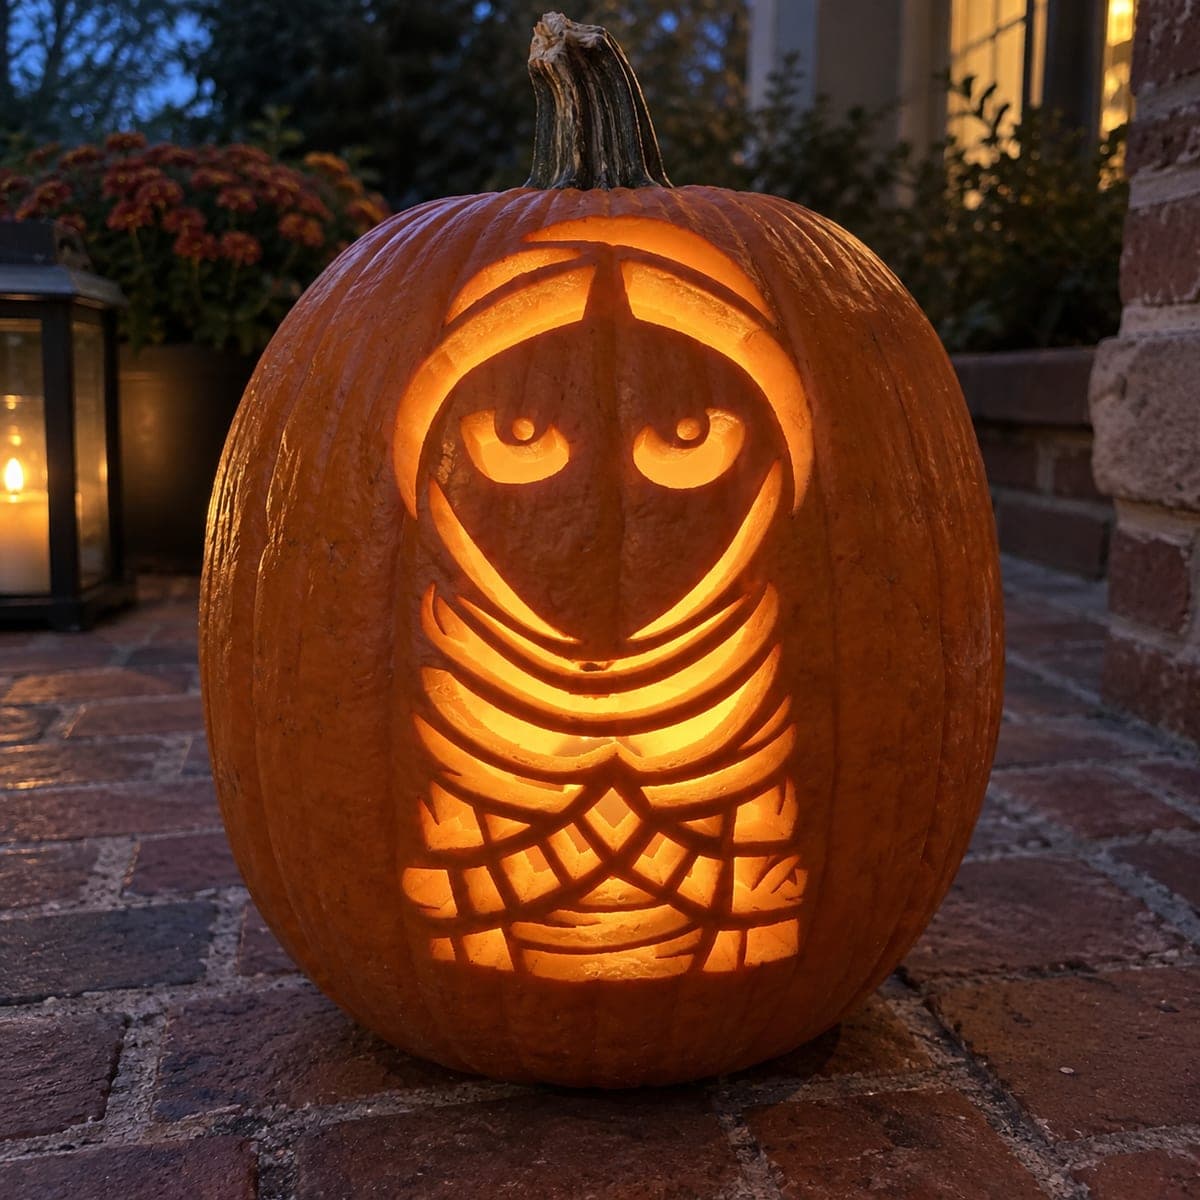
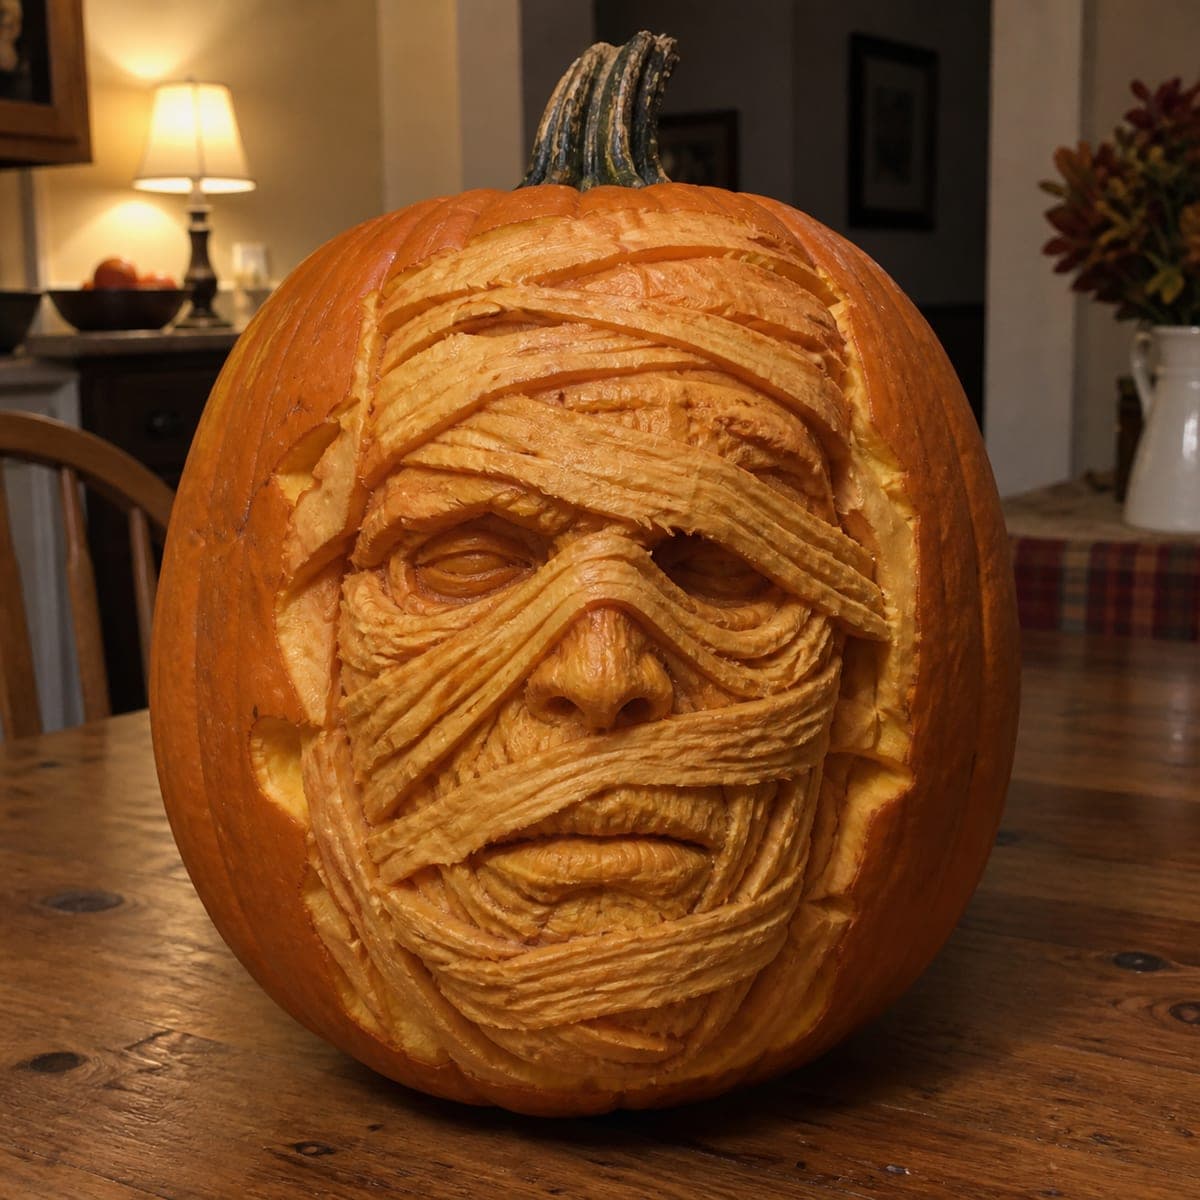
Deeply sculpted bandages wrap this pumpkin into a brooding mummy face, with sunken eyes and a grim mouth peering between the layered wraps. The effect comes from true 3D carving: the whole front is skinned, then each bandage is shaped with ribbon and loop tools so the strips appear to cross over one another. Rough in the eye sockets and nose first to anchor the face, and mist the finished carve with water to keep the exposed flesh from drying out.

This is an AI-generated concept image: a realistic, carvable design idea rather than a photo of a finished carve. AI concepts are always labeled and sit out the leaderboard and the contest.

No ratings yet · Sign in to rate

Comments (0)

  • No comments yet — be the first.

Save without an account. Sign in to like or comment.

Our tips for carving a similar design

The core trick here is 3D relief carving, where you skin the entire front of the pumpkin and then shape the flesh at different depths so overlapping bandages seem to cross over one another. The plan is to rough in the eyes and nose first as anchors, then wrap sculpted strips around them from brow to chin. Since this is a concept image, treat it as a target look you could recreate on a real, thick-walled pumpkin.

Written by PumpkinCarvingIdeas.com, inspired by the image above. These are our suggestions, not instructions from the uploader. This approach to the AI concept has not been tested on a real pumpkin.

From pumpkin to porch

  1. Pick a big, thick-walled pumpkin and prep it

    Choose a large pumpkin with a smooth, flat-ish front and walls at least an inch and a half thick, since 3D carving removes a lot of skin without cutting through. Cut a lid from the bottom or back rather than the top so the stem stays intact for the look shown. Scoop the inside wall behind the face down to a workable thickness. Sketch the face zones lightly in pencil before any tool touches the skin.

  2. Skin the whole front and map the bandages

    Use a ribbon or peeling tool to remove the outer orange skin across the entire face area, leaving the pale flesh exposed. Draw your bandage lines as long diagonal bands that wrap across the face and cross near the cheeks and forehead. Keep the strips varied in width so the wraps look natural. Leave the outer skin uncarved around the edges as a dark frame.

  3. Rough in the eye sockets and nose

    Anchor the face by scooping the two eye sockets deep so they read as sunken, then shape the nose ridge and nostrils as a raised form between them. Work these features first because everything else wraps around them. Go slowly and keep checking from a few feet back, since depth reads differently up close. Round the brow above the eyes so a bandage can arch over it.

  4. Sculpt the overlapping bandage strips

    Working with loop tools, carve each bandage so one edge dips lower than the strip beside it, which is what makes them appear to cross over. Angle your cuts so every strip has a shaded groove along its border. Follow the wrap lines down over the mouth, leaving a grim slot of lips peeking through. Keep transitions smooth and rounded rather than sharp so the flesh looks like cloth.

  5. Deepen shadows and open the darkest gaps

    Once the wraps are shaped, deepen the grooves between strips and inside the eye sockets to build contrast. If you want glow to escape, cut a few small full openings last, tucked in the deepest eye and mouth shadows, so the pumpkin keeps its strength while you carve. Save these true cutouts for the end. Test-fit an LED before finishing.

  6. Mist, light, and photograph

    Spray the whole exposed surface with water and wipe away pulp crumbs so the flesh stays bright and does not dry out. Drop in a warm LED light, never a candle, since the deep relief traps heat. Shoot in a dim room so the shading and sunken eyes carry the mood. Re-mist and refrigerate between showings to stretch its life.

Gather your supplies

Check things off as you get ready.

Work on a stable surface, keep your free hand out of the cutting path, and have an adult handle sharp tools.

Three levels of light

  • Leave intact

    The untouched orange skin around the outer edge stays dark and frames the face.

  • Peel & shade

    The skinned bandage strips across the whole face glow a soft dim orange, which carries most of the effect.

  • Cut through

    A few small full cutouts tucked in the deepest eye and mouth shadows give the brightest points.

Learn the carving basics

Before you start cutting

Do I have to cut all the way through anywhere?

Not for most of the design, since the mummy look comes from shading skinned flesh at different depths. You only need a few tiny full cutouts in the darkest eye and mouth gaps if you want direct glow. Cut those last so the wall stays strong while you sculpt.

How thick should the walls be for this kind of relief?

Aim for at least an inch and a half of solid flesh across the front. 3D sculpting shaves away a surprising amount, and thin walls will blow through into unwanted holes. A dense, heavy pumpkin gives you the most room to carve the overlapping strips.

How do I keep the skinned surface from drying out?

Exposed flesh browns and shrinks fast once the skin is gone. Mist the whole carve with water while you work and again before display, then wipe off loose pulp. Between showings, seal it in a bag or wrap it and keep it cold to slow the drying.

Your take belongs here, too.

Changed a detail? Made it simpler? Share a photo of your version and tell the community what worked.

Share your pumpkin

More pumpkins like this

You've reached the end · 8 pumpkins
The Patch Report

Fresh pumpkins, in your inbox.

The best new carvings, ideas worth stealing, and how-tos for carving season. Short, seasonal, and gone by November.

A short email during carving season. Unsubscribe anytime. See our privacy policy.