Halloween Pumpkin Carving Contest Β· Starts October 1st Β· $500 in prizes
← Back to ideas
@ai_concepts
Sep 25, 2026
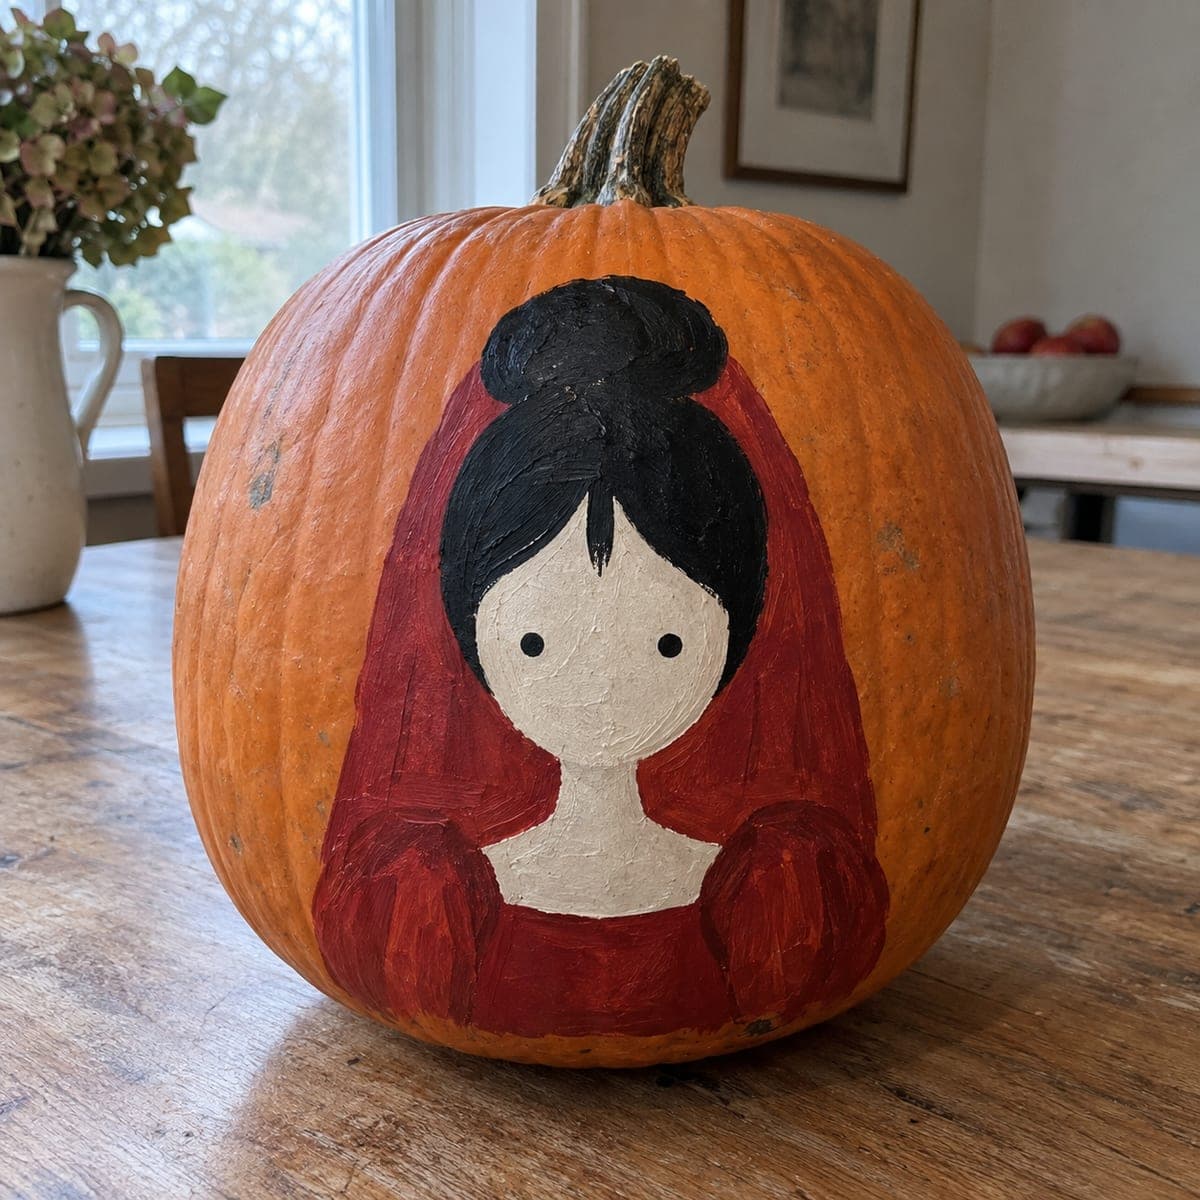
Painted Lydia Deetz No-Carve Pumpkin IdeaAI
0

Report this carving

Tell us what is wrong. Reports are private.

Painted Lydia Deetz No-Carve Pumpkin Idea

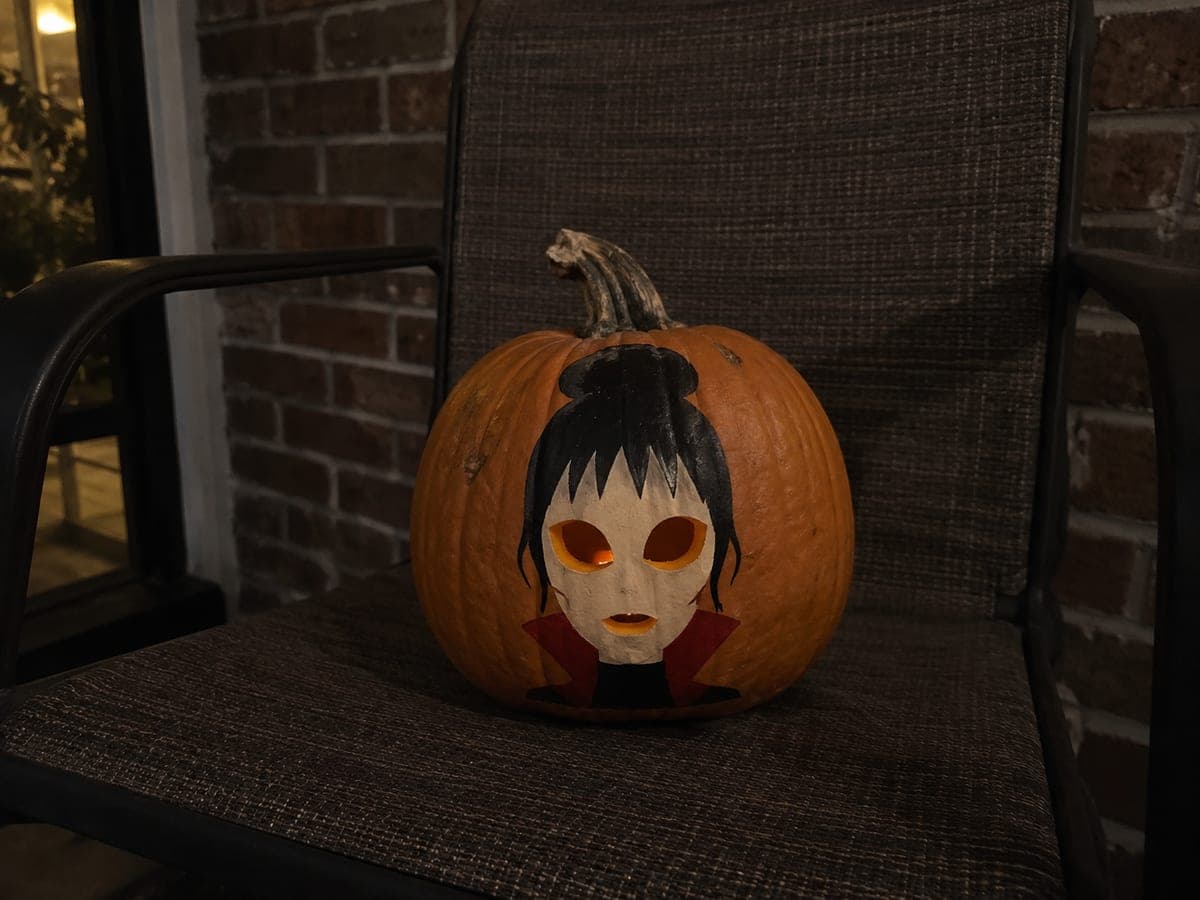
This no-carve Lydia Deetz pumpkin idea brings the gothic character to life with flat acrylic shapes in black, cream, and deep red on intact rind. Use a small fan brush to mimic the texture of her voluminous hair and a fine liner for the collar detail. Seal with a matte varnish to keep the pale face tones from yellowing over time.

No ratings yet Β· Sign in to rate

Comments (0)

  • No comments yet β€” be the first.

Save without an account. Sign in to like or comment.

Our tips for carving a similar design

This design skips the knife entirely and builds Lydia in flat acrylic on the intact rind. Broad brush shapes in black, cream, and deep red do the heavy lifting, and a small fan brush mimics the texture of her voluminous hair without requiring fine detail. A matte varnish topcoat protects the pale face tones from yellowing under porch lighting.

From pumpkin to porch

  1. Clean and dry the pumpkin

    Wipe the pumpkin surface with a damp cloth to remove any dirt or waxy residue, then let it air dry completely. Acrylic paint bonds poorly to a damp or oily surface, so do not rush this step. A quick pass with rubbing alcohol on a cotton ball improves adhesion further.

  2. Sketch the layout

    Lightly draw the face oval, hair mass, and collar placement with a soft pencil or chalk marker. Keep lines light so they disappear under paint. Position the face slightly above center so the hair fills the upper half of the pumpkin naturally.

  3. Block in the hair

    Load a wide flat brush or small fan brush with black paint and fill the entire hair mass first. Use the fan brush in sweeping strokes to create visible hair texture. Let this layer dry before moving inward to the face.

  4. Paint the face and collar

    Mix a pale cream and fill the oval face area with two coats, letting each dry before the next. Once the face base is solid, use a fine liner brush to add the collar detail in black and a deep red wash for the lips. A tiny black dot for each eye keeps the look graphic and legible from a distance.

  5. Seal the surface

    Once all paint is dry, spray a thin coat of matte acrylic sealer to protect the design. Matte finish keeps the pale cream tones from picking up glare and preserves the understated gothic look. One coat is usually sufficient for seasonal outdoor display.

  6. Display

    Place the finished pumpkin where an external spotlight or porch light illuminates the front face. Because there are no cutouts, all the visual impact comes from the painted surface, so front lighting is essential. Rotate the pumpkin once a day to slow any natural ripening on the back side.

Written with AI to match this design

Gather your supplies

Check things off as you get ready.

Work on a stable surface, keep your free hand out of the cutting path, and have an adult handle sharp tools.

Three levels of light

  • Leave intact

    The entire rind surface stays intact; the bare orange rind at the back and sides frames the painted front face

  • Peel & shade

    None, this design leaves the shell intact throughout

  • Cut through

    None, use an outside spotlight or porch light to illuminate the painted face instead

Learn the carving basics

Before you start cutting

How do I keep the cream face paint from looking orange against the rind?

Apply a white gesso or white acrylic base coat over the face oval first and let it dry before adding the cream layer. The white undercoat blocks the orange rind color and makes the cream tone appear much truer. Two thin white coats work better than one thick coat.

Will the paint crack when the pumpkin starts to shrink?

Acrylic paint is flexible enough to handle minor rind changes for the first week or two. Keeping the pumpkin out of direct sunlight and extreme temperature swings slows the shrinkage. A sealer topcoat also helps the paint layer move with the rind rather than cracking away from it.

Can I use a printed stencil to trace the face shapes instead of drawing freehand?

Yes. Print the character outline, cut it out as a rough mask, and hold or tape it lightly to the pumpkin while you trace around it with chalk. Remove the paper and fill in the shapes with paint. This is especially useful for getting the collar lace detail proportioned correctly.

Your take belongs here, too.

Changed a detail? Made it simpler? Share a photo of your version and tell the community what worked.

Share your pumpkin

More pumpkins like this

You've reached the end Β· 8 pumpkins
The Patch Report

Fresh pumpkins, in your inbox.

The best new carvings, ideas worth stealing, and how-tos for carving season. Short, seasonal, and gone by November.

A short email during carving season. Unsubscribe anytime. See our privacy policy.