Halloween Pumpkin Carving Contest · Starts October 1st · $500 in prizes
← Back to ideas
@ai_concepts
Aug 18, 2026
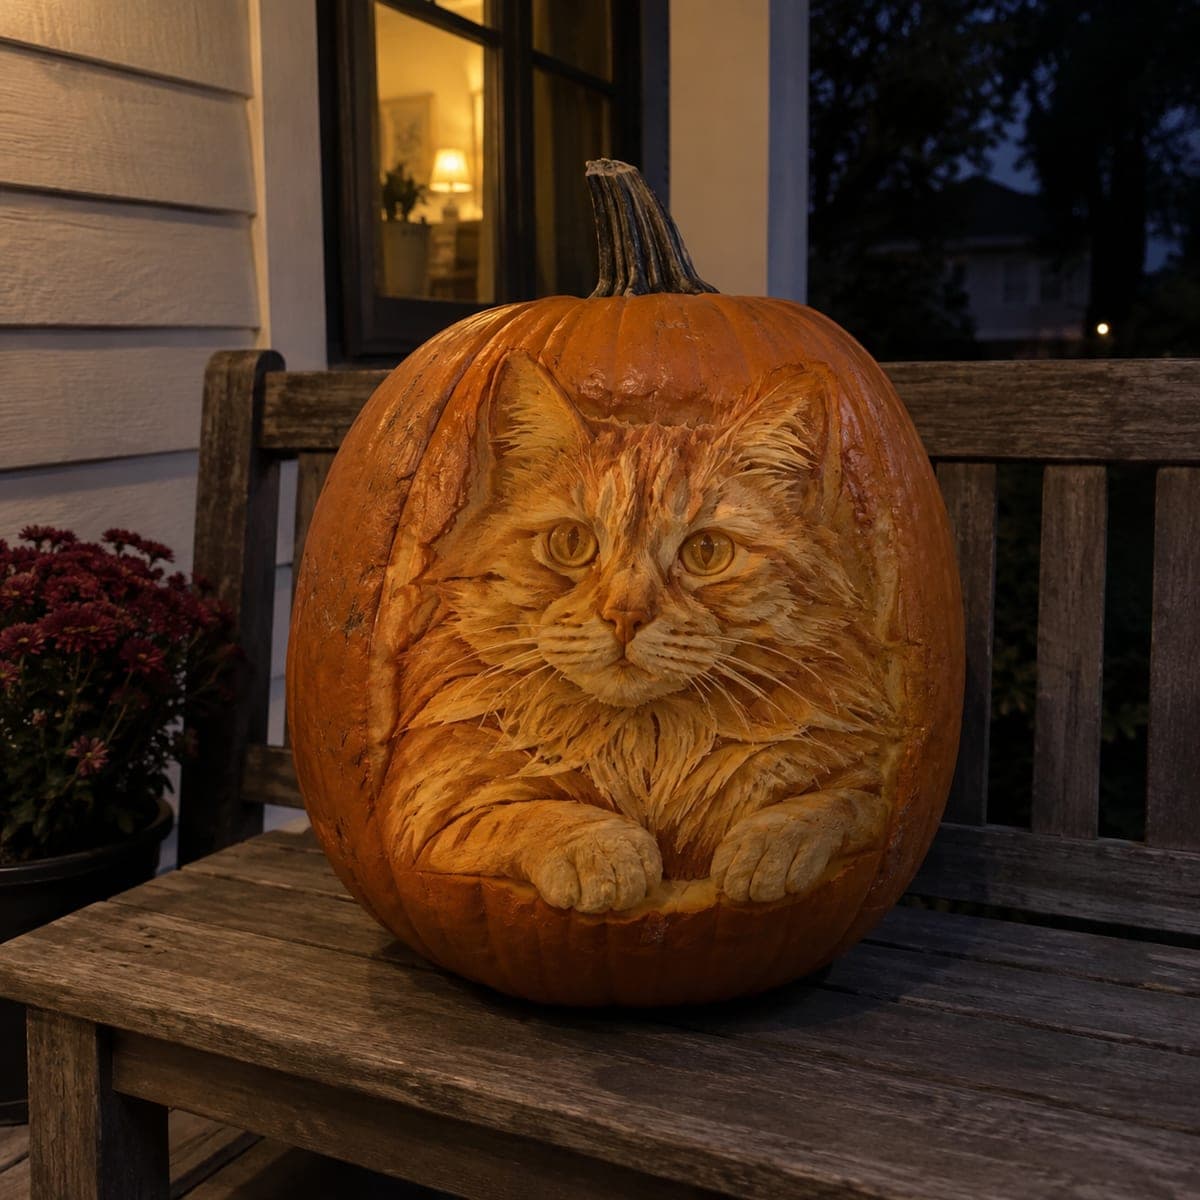
Realistic Tabby Cat Portrait Pumpkin CarvingAI
0

Realistic Tabby Cat Portrait Pumpkin Carving

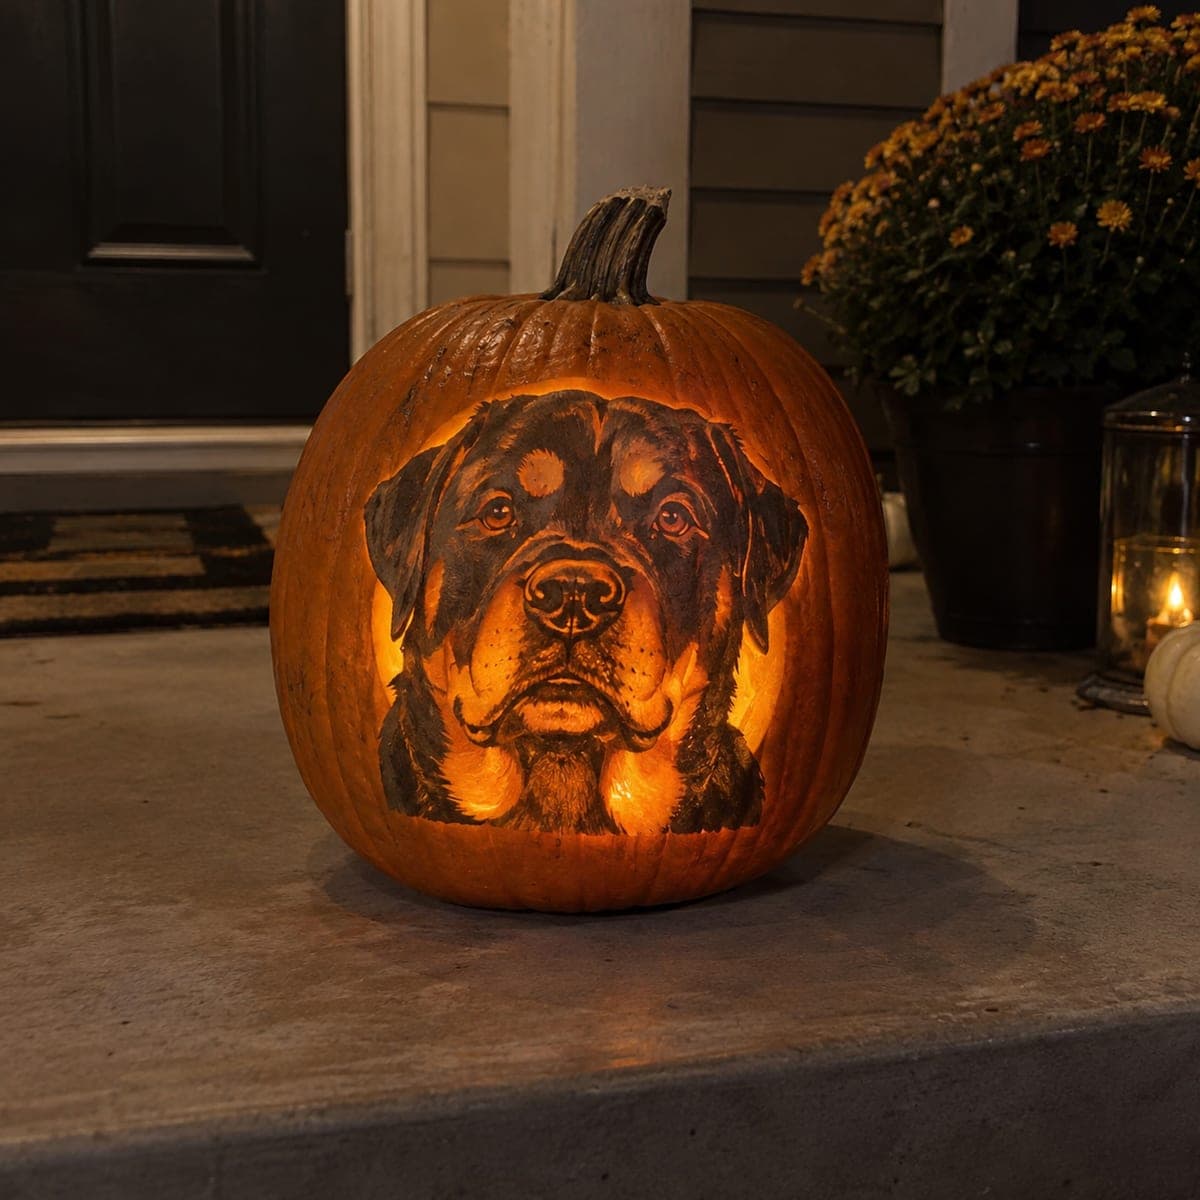
Every whisker and fur stripe of this tabby cat portrait is etched into the pumpkin surface, glowing softly against a twilight garden wall. The luminous eyes are carved deepest, almost through the wall, which is what makes them read as glassy and alive. Work from a high-contrast photo, etch the face plates first, then pull long thin strokes outward for fur, and photograph it at dusk for the best glow.

This is an AI-generated concept image: a realistic, carvable design idea rather than a photo of a finished carve. AI concepts are always labeled and sit out the leaderboard and the contest.

No ratings yet · Sign in to rate
Comments (0)

  • No comments yet — be the first.

Save without an account. Sign in to like or comment.

Our tips for carving a similar design

The whole illusion here relies on shading rather than cutting, so you sculpt fur and features by peeling the pumpkin skin to different depths instead of making big holes. The plan is to map the cat's face plates first, then pull thin fur strokes outward, and save the eyes as your only near-full cutouts so they glow brightest. Everything else stays as controlled peeled shading, which is what gives the portrait its soft, lifelike depth.

Written by PumpkinCarvingIdeas.com, inspired by the image above. These are our suggestions, not instructions from the uploader. This approach to the AI concept has not been tested on a real pumpkin.

From pumpkin to porch

  1. Pick a photo and transfer the map

    Choose a high-contrast, front-facing tabby photo where the eyes, nose, and fur direction read clearly. Convert it to a few tone bands so you know what stays dark, what glows dim, and what gets brightest. Tape the pattern to the smoothest, flattest face of the pumpkin and poke through the main outlines with a pin or awl. Remove the paper and connect the dots with a washable marker so you can see the full layout before any blade touches the skin.

  2. Gut and thin the carving wall

    An adult should cut a lid from the bottom, not the top, so the stem stays intact and the pumpkin sits flat on a wall. Scoop the seeds and pulp, then scrape the inside of the face area until the wall is about one inch thick. A thinner wall makes shading glow more evenly and gives you room to carve the eyes deep later. Work slowly with a sturdy scoop and keep the outside surface clean and dry.

  3. Etch the face plates first

    Using a lino or ribbon gouge, peel only the top skin off the broad shapes: the cheeks, the bridge of the nose, the forehead, and the inner ears. Removing skin exposes the lighter flesh that glows dim orange, so these become your mid tones. Keep the darkest tabby markings as untouched skin so they stay in shadow. Step back often and check that the face reads as a face before you add any detail.

  4. Pull the fur strokes

    Switch to a small V-gouge or detail knife and carve long, thin strokes that follow the fur direction, always sweeping outward from the center of the face toward the ruff and ear tips. Vary depth so some strokes glow brighter than others, which builds the layered tabby texture. Leave narrow ridges of skin between strokes so the fur has contrast and structure. This is slow, patient work, so take breaks to keep your cuts clean and consistent.

  5. Carve the eyes and fine details last

    The eyes are the deepest cuts, carved almost through the wall so they read as glassy and bright, but leave a thin membrane and a small skin pupil so they do not blow out to pure white. Etch the nose and mouth as shallow shading, then score the whiskers as fine, faint lines that catch just a little glow. Keep whisker lines thin but not cut all the way through, so the surface stays strong. Cut the largest openings, if any, only after every delicate line is done.

  6. Light it and shoot at dusk

    Set a battery LED or two inside, never a candle, since flame heat can scorch your thin shaded wall. Warm white LEDs bring out the orange fur best, and a second small light aimed at the eyes makes them pop. Photograph at dusk when there is still a little blue in the sky, matching the twilight look in the reference. Mist the surface lightly and keep the pumpkin cool between showings to slow drying and shrinking of the fine detail.

Gather your supplies

Check things off as you get ready.

Work on a stable surface, keep your free hand out of the cutting path, and have an adult handle sharp tools.

Three levels of light

  • Leave intact

    The darkest tabby stripes, the outer fur shadows, and the pupils stay as untouched skin.

  • Peel & shade

    The cheeks, nose bridge, forehead, inner ears, and most fur strokes are skin-peeled for a soft mid glow.

  • Cut through

    The eyes are carved nearly through the wall so they read brightest and glassy.

Learn the carving basics

Before you start cutting

Do I need to cut all the way through anywhere?

Almost none of this design is a true cutout. The look comes from peeling skin to different depths, and only the eyes are carved nearly through the wall. Leave a thin membrane even on the eyes so they glow warm instead of washing out to bright white.

How do I keep the whiskers from breaking off?

Do not cut whiskers as open slots. Score them as fine, shallow lines that only catch a little light, so the surrounding surface stays intact. Thin etched lines keep the whole face structurally strong and still read clearly at dusk.

Why does the fur look layered instead of flat?

Vary the depth and length of your gouge strokes and always follow the natural fur direction outward from the face. Leaving narrow ridges of skin between strokes creates contrast, so some lines glow brighter than others. That mix of tones is what makes the coat look soft and three dimensional.

Your take belongs here, too.

Changed a detail? Made it simpler? Share a photo of your version and tell the community what worked.

Share your pumpkin

More pumpkins like this

You've reached the end · 8 pumpkins
The Patch Report

Fresh pumpkins, in your inbox.

The best new carvings, ideas worth stealing, and how-tos for carving season. Short, seasonal, and gone by November.

A short email during carving season. Unsubscribe anytime. See our privacy policy.