Halloween Pumpkin Carving Contest · Starts October 1st · $500 in prizes
← Back to ideas
@ai_concepts
Jul 21, 2026
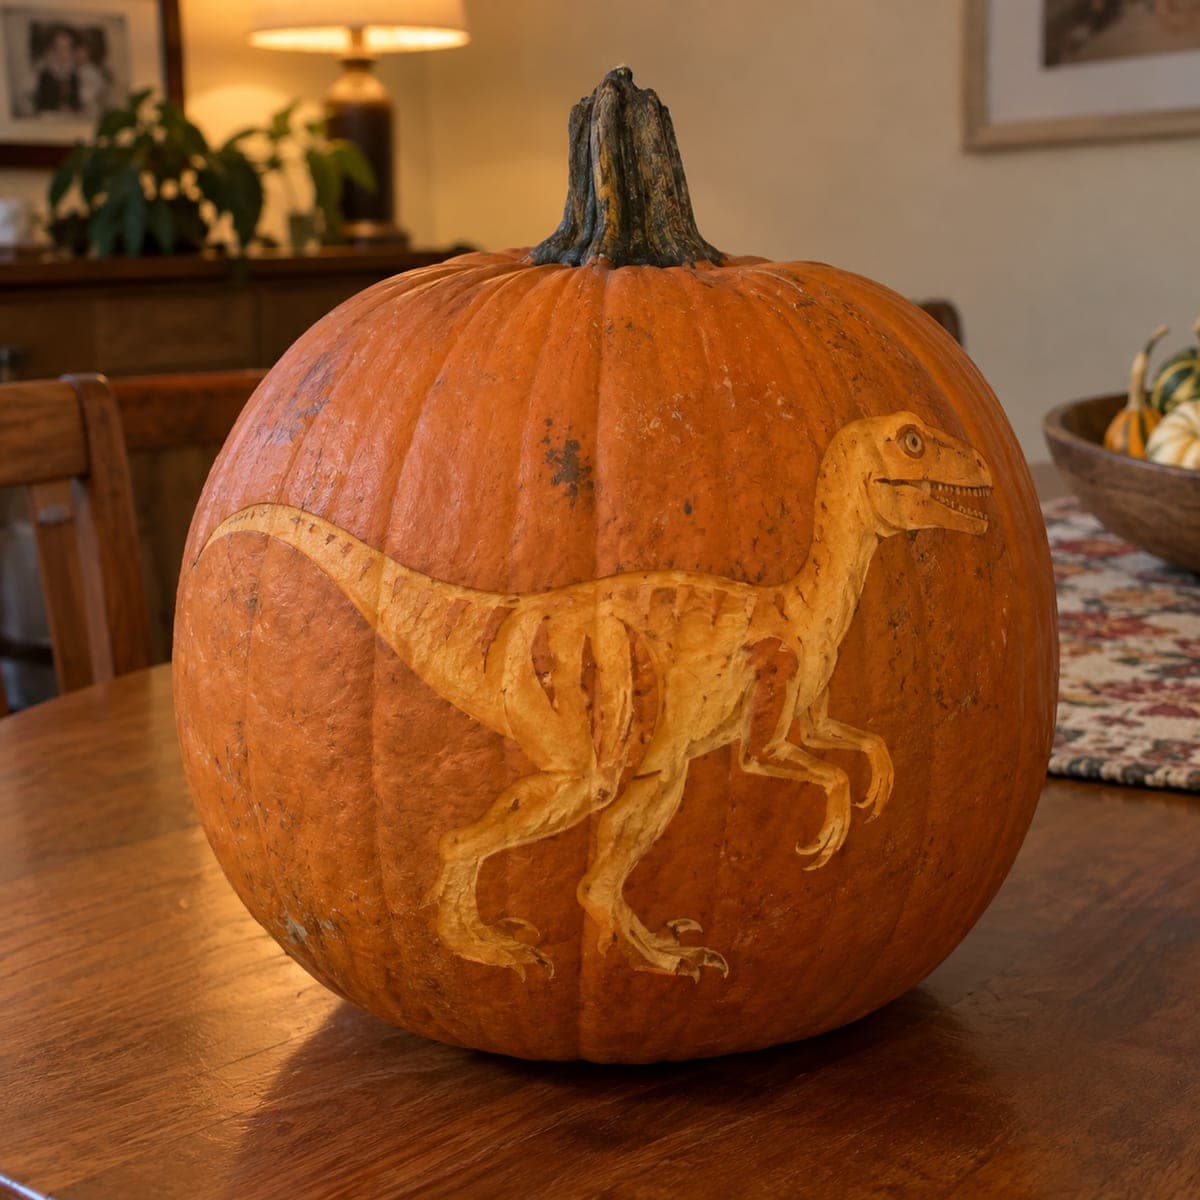
Roaring Raptor Dinosaur Painted PumpkinAI
0

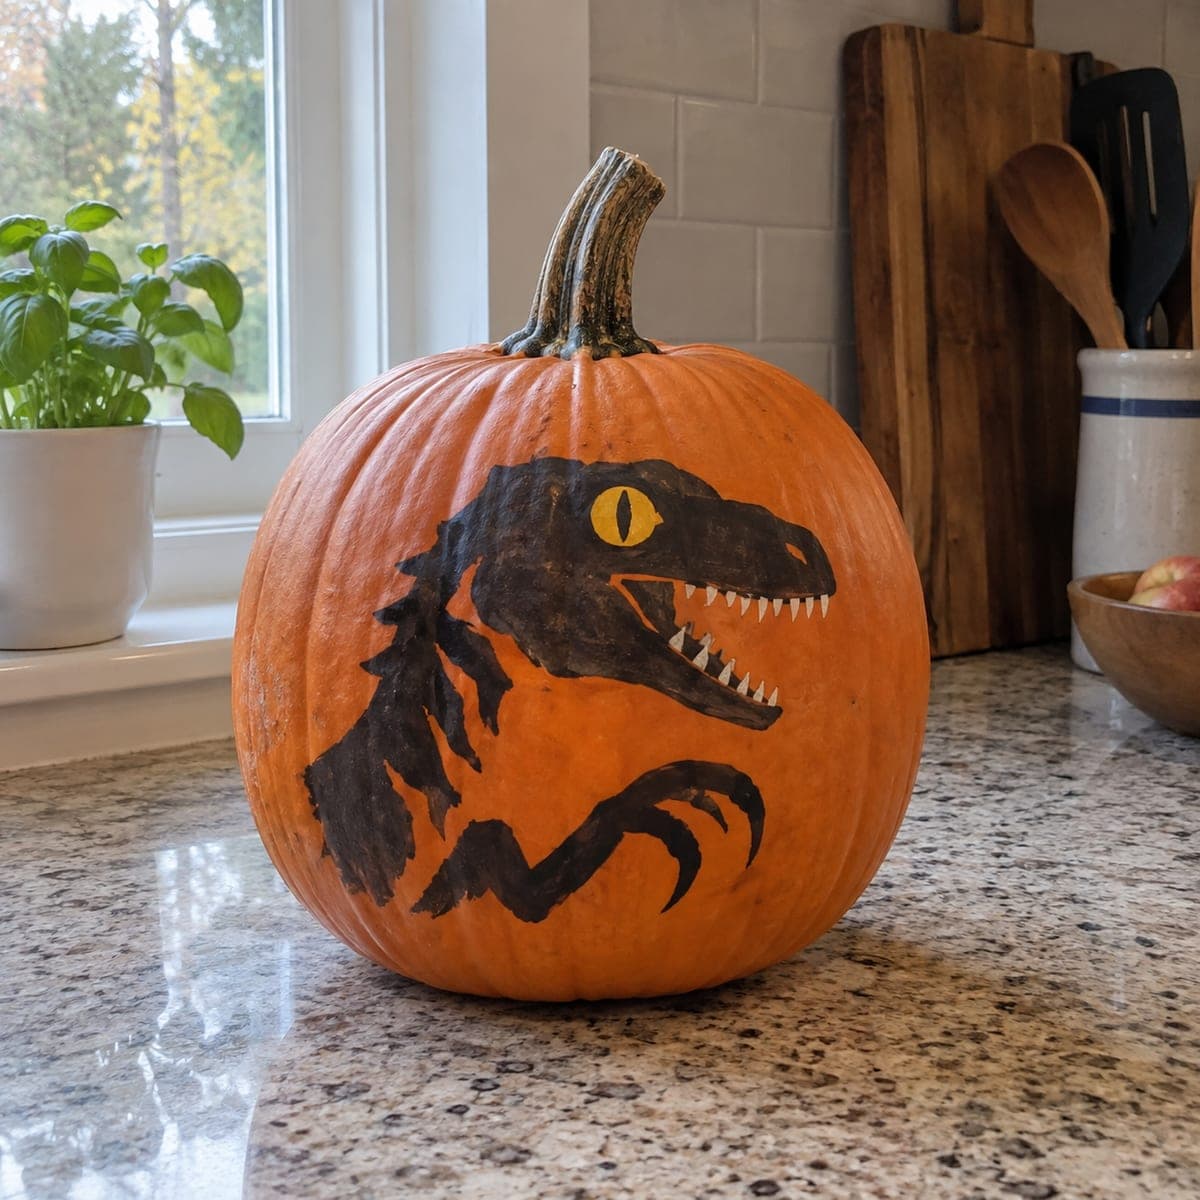
Roaring Raptor Dinosaur Painted Pumpkin

Bold black brushstrokes give this raptor head serious Jurassic attitude, complete with slit yellow eye, white fangs, and one reaching claw. The high-contrast silhouette style is forgiving, since ragged brush edges read as feathers and scales. Sketch the head and claw in chalk, fill with black acrylic, then drop in the eye and teeth once dry. Dinosaur-obsessed kids will fight over this one.

This is an AI-generated concept image: a realistic, carvable design idea rather than a photo of a finished carve. AI concepts are always labeled and sit out the leaderboard and the contest.

No ratings yet · Sign in to rate
Comments (0)

  • No comments yet — be the first.

Save without an account. Sign in to like or comment.

Our tips for carving a similar design

The core trick here is a high-contrast black silhouette, where ragged brush edges read as feathers and scales so precision is not required. The plan is to chalk the raptor head and reaching claw onto the front of the pumpkin, fill the shape solid with black acrylic, then add the slit yellow eye and white fangs once the base is dry. Because nothing is cut, the whole thing stays sturdy and safe for kids to help with.

Written by PumpkinCarvingIdeas.com, inspired by the image above. These are our suggestions, not instructions from the uploader. This approach to the AI concept has not been tested on a real pumpkin.

From pumpkin to porch

  1. Pick and clean your canvas

    Choose a pumpkin with a broad, smooth face and few deep ribs, since flat areas hold brushstrokes best. Wipe the surface with a damp cloth and let it dry fully so paint grips instead of smearing. Set it on the counter turned to show its best side. No cutting or scooping is needed for this design, so the pumpkin will last longer.

  2. Sketch the head and claw in chalk

    Use light chalk or a washable marker to rough in the raptor's profile: the open jaw, the sloped snout, and the crest of feathers running down the neck. Add the single reaching claw curling up from the lower right. Keep the outline loose and jagged, since messy edges look like scales later. Step back and check the proportions before committing to paint.

  3. Fill the silhouette with black

    Load a medium flat brush with black acrylic and fill the whole head and claw shape solid. Leave a small blank oval where the eye will sit and skip the row of teeth along the jaw for now. Let the ragged brush marks along the neck stay rough on purpose to suggest feathers. Allow this coat to dry completely, then add a second coat if the orange shows through.

  4. Drop in the eye and fangs

    Once the black is fully dry, paint the slit eye with yellow acrylic and add a thin black vertical pupil down the center. Use white paint and a small round brush to fill in the triangular teeth along the upper and lower jaw. Keep the fangs slightly uneven for a menacing look. A fine liner brush helps you keep the points crisp.

  5. Seal and stage the finish

    Let everything cure for a few hours, then brush on a thin coat of matte sealer to protect the paint from smudging. Set an LED tea light or a small battery lantern beside the pumpkin to make the black silhouette pop after dark. Turn the design toward your entryway or kitchen window. Snap your photo in low light so the yellow eye glows against the orange.

Gather your supplies

Check things off as you get ready.

Work on a stable surface, keep your free hand out of the cutting path, and have an adult handle sharp tools.

Three levels of light

  • Leave intact

    The orange pumpkin skin stays untouched as the bright background that frames the black raptor.

  • Peel & shade

    If you want extra depth, lightly scrape a thin halo of skin around the head so a soft glow outlines the silhouette when lit.

  • Cut through

    For a carved variation, cut only the slit eye all the way through so it shines brightest against the painted black head.

Learn the carving basics

Before you start cutting

Do I need to carve anything for this design?

No, this is a no-carve painted pumpkin, so the surface stays sealed and lasts much longer. If you want a little glow, you can optionally scrape a thin skin halo or cut just the eye through. Otherwise a battery lantern set beside it does all the work.

What if I make a mistake with the black outline?

Because the raptor is a jagged silhouette, small slips actually help by reading as feathers and scales. If a line goes badly wrong, wipe wet acrylic off with a damp cloth before it sets. Once dry, you can also paint over an error with a second black coat.

How do I keep the yellow eye and white teeth from muddying?

Let the black base coat dry completely before adding any light colors, or they will pull up the black and turn gray. Use a fine brush and a small amount of paint, building the eye and fangs in two thin layers if needed. A quick pass with the sealer at the end locks the contrast in.

Your take belongs here, too.

Changed a detail? Made it simpler? Share a photo of your version and tell the community what worked.

Share your pumpkin

More pumpkins like this

You've reached the end · 8 pumpkins
The Patch Report

Fresh pumpkins, in your inbox.

The best new carvings, ideas worth stealing, and how-tos for carving season. Short, seasonal, and gone by November.

A short email during carving season. Unsubscribe anytime. See our privacy policy.