Halloween Pumpkin Carving Contest · Starts October 1st · $500 in prizes
← Back to ideas
@ai_concepts
Sep 25, 2026
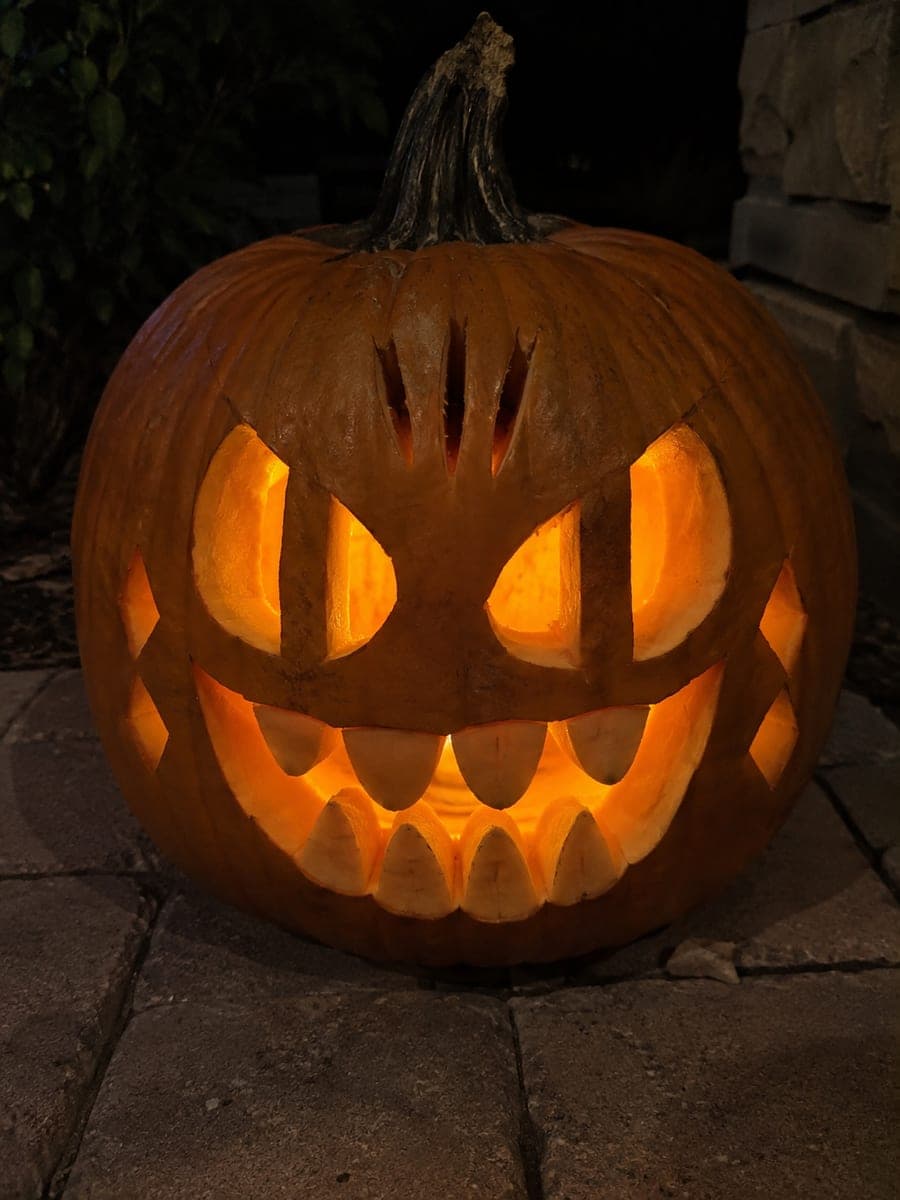
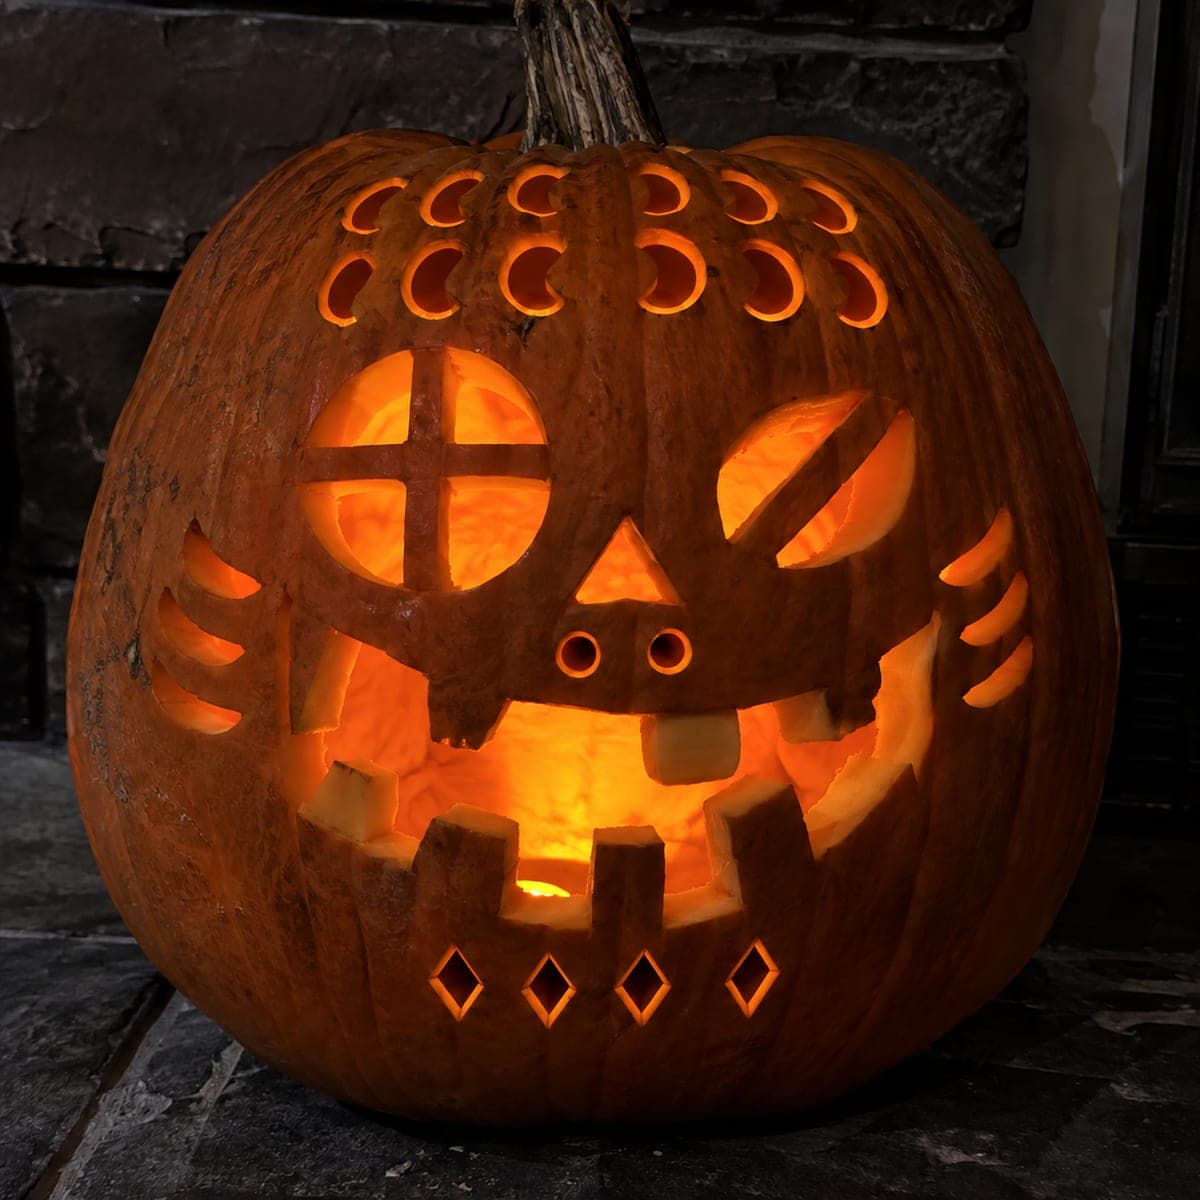
Barred-Eye Monster Pumpkin with Cheek DiamondsAI
0

Report this carving

Tell us what is wrong. Reports are private.

Barred-Eye Monster Pumpkin with Cheek Diamonds

Two barred eye openings, three forehead slash accents, eight individually rooted teeth, and separate diamond cutouts on the cheeks make this monster pumpkin carving idea complex without being overwhelming. Anchor the eye bars at top and bottom before completing the full socket cuts, and tackle the forehead slashes as simple isolated rectangles. Rooting all eight teeth individually requires careful spacing, so mark each tooth base before any mouth cut begins. On a dark patio, the diamond cutouts scatter points of light around the ferocious face.

No ratings yet · Sign in to rate
Comments (0)

  • No comments yet — be the first.

Save without an account. Sign in to like or comment.

Our tips for carving a similar design

The visual complexity here comes from stacking multiple element types: barred eyes, forehead slashes, rooted teeth, and diamond cheek cutouts all contribute to the glowing whole. The structural approach is methodical: cut the eye bars first, treat each forehead slash as an independent rectangle, and mark every tooth root before any mouth cut begins. Completing features in order of structural importance keeps the shell from shifting mid-carve.

From pumpkin to porch

  1. Hollow and sketch the full layout

    Cut a back-angled lid and scoop the interior to a consistent inch. Sketch all elements in washable marker: the two eye bar positions, three forehead slash boundaries with gaps between, the mouth outline with eight tooth root marks, and the two cheek diamond positions. Review the full layout before cutting.

  2. Carve the eye bars

    Cut each eye socket in sections around its bar, anchoring the bar at top and bottom before removing the socket pieces. A rigid narrow blade gives you the steadiest control around the bar ends. Check each bar's stability with a gentle press before moving to the next eye.

  3. Carve the forehead slashes

    Each forehead slash is a simple isolated narrow rectangle. Cut one end, then the two long sides, then the other end, and remove the piece. Leave solid rind between each slash so the forehead retains structural continuity. Three slashes in a row work quickly once you establish a rhythm.

  4. Carve the cheek diamonds

    Mark each diamond with four straight sides and cut each side independently, meeting cleanly at the corners. Remove the diamond piece. Leave a substantial rind border around each diamond, particularly between the diamond and the nearest eye socket or mouth edge.

  5. Carve all eight teeth

    Mark every tooth root position before making the mouth opening. Cut the open sections of the mouth first, then narrow each tooth toward its tip using a detail blade. Confirm each root is at least a quarter-inch wide before finalizing the tip shape. Eight teeth require patience but pay off in visual impact.

  6. Seal and light on the patio

    Coat every cut surface with petroleum jelly. Place a warm LED inside and set the pumpkin on a dark patio surface so the diamond scatter-points and the barred eye shadows both read clearly. Reapply petroleum jelly every two days to keep the bridges supple.

Written with AI to match this design

Gather your supplies

Check things off as you get ready.

Work on a stable surface, keep your free hand out of the cutting path, and have an adult handle sharp tools.

Three levels of light

  • Leave intact

    The rind between eye bars, between forehead slashes, around cheek diamonds, and between teeth stays solid for structural support.

  • Peel & shade

    None; this design uses full cut-throughs for all glowing areas.

  • Cut through

    Both barred eye sockets, all three forehead slashes, both cheek diamonds, and the eight-tooth mouth opening are cut completely through for full-brightness glow.

Learn the carving basics

Before you start cutting

Is there a risk the forehead slashes will weaken the area where the eye bars are?

Yes if the slashes are too long or too close to the eye socket tops. Keep each slash at least three-quarters of an inch below the upper eye socket boundary. Shorter slashes with clean bridges between them actually look bolder and preserve more structural rind.

What is the best sequence for rooting eight teeth without losing track?

Number each tooth lightly in marker from left to right before any cuts. Cut all root boundaries first across the entire mouth before narrowing any individual tooth tip. This way you can verify all root widths in one pass before committing to the tip shapes.

How will the cheek diamonds scatter light differently from the eye bars?

Eye bars cast a linear shadow bar inside the pumpkin, creating a focused visual line. Diamond cutouts scatter four triangular light points onto nearby surfaces, giving the impression that the pumpkin is radiating from multiple spots. Together they create depth and visual movement that a simpler face design lacks.

Your take belongs here, too.

Changed a detail? Made it simpler? Share a photo of your version and tell the community what worked.

Share your pumpkin

More pumpkins like this

You've reached the end · 8 pumpkins
The Patch Report

Fresh pumpkins, in your inbox.

The best new carvings, ideas worth stealing, and how-tos for carving season. Short, seasonal, and gone by November.

A short email during carving season. Unsubscribe anytime. See our privacy policy.