Halloween Pumpkin Carving Contest · Starts October 1st · $500 in prizes
← Back to ideas
@ai_concepts
Sep 25, 2026
Detailed Skeleton Hand Pumpkin with Finger Joint OpeningsAI
0

Report this carving

Tell us what is wrong. Reports are private.

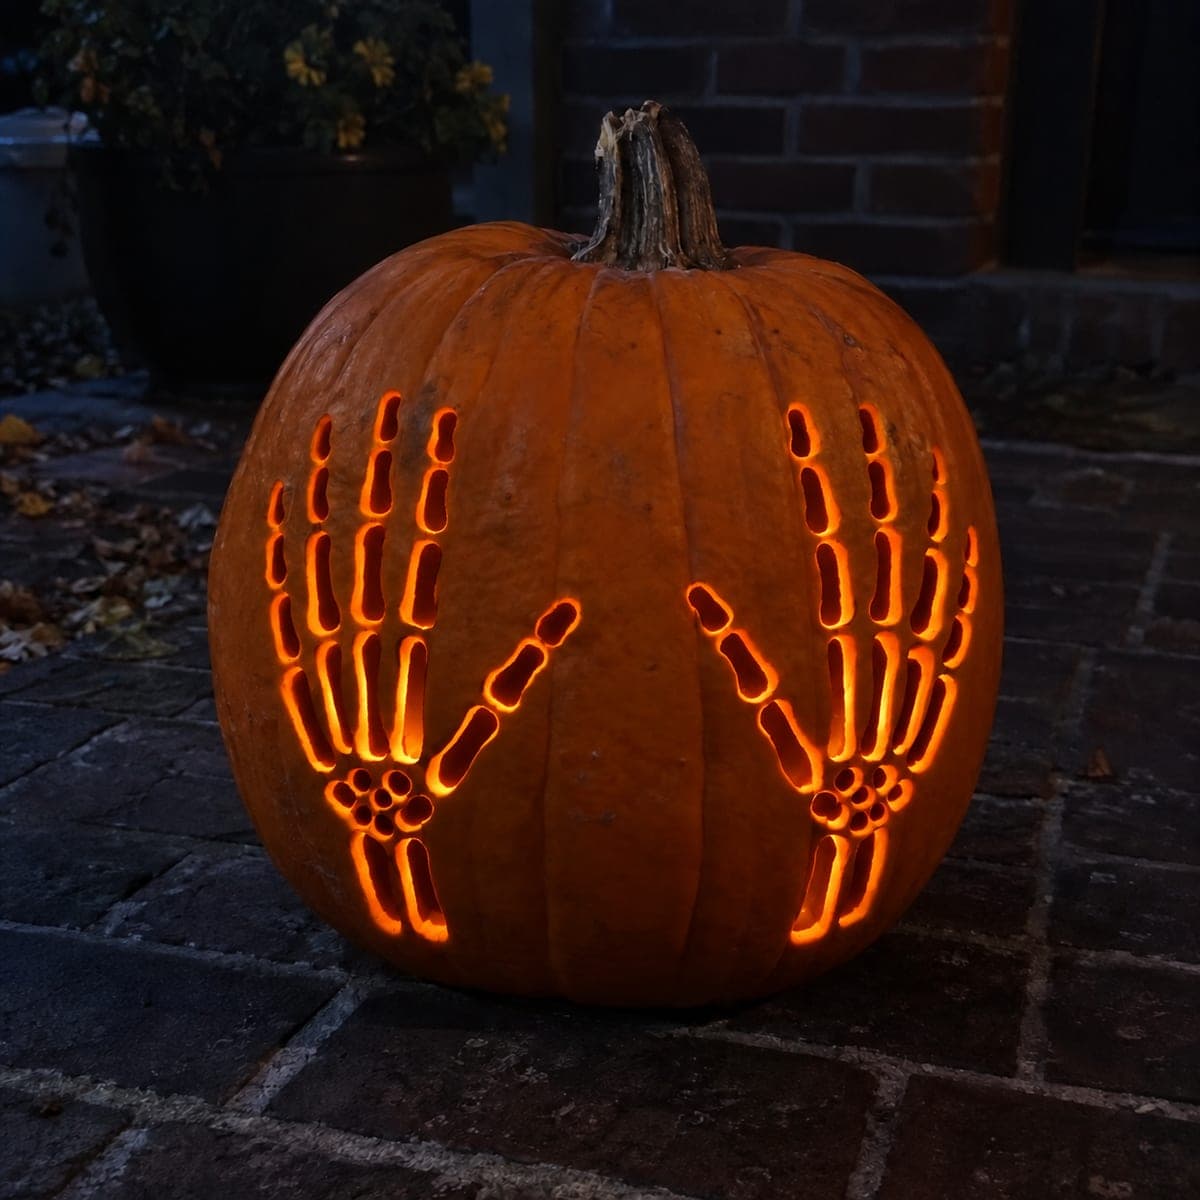
Detailed Skeleton Hand Pumpkin with Finger Joint Openings

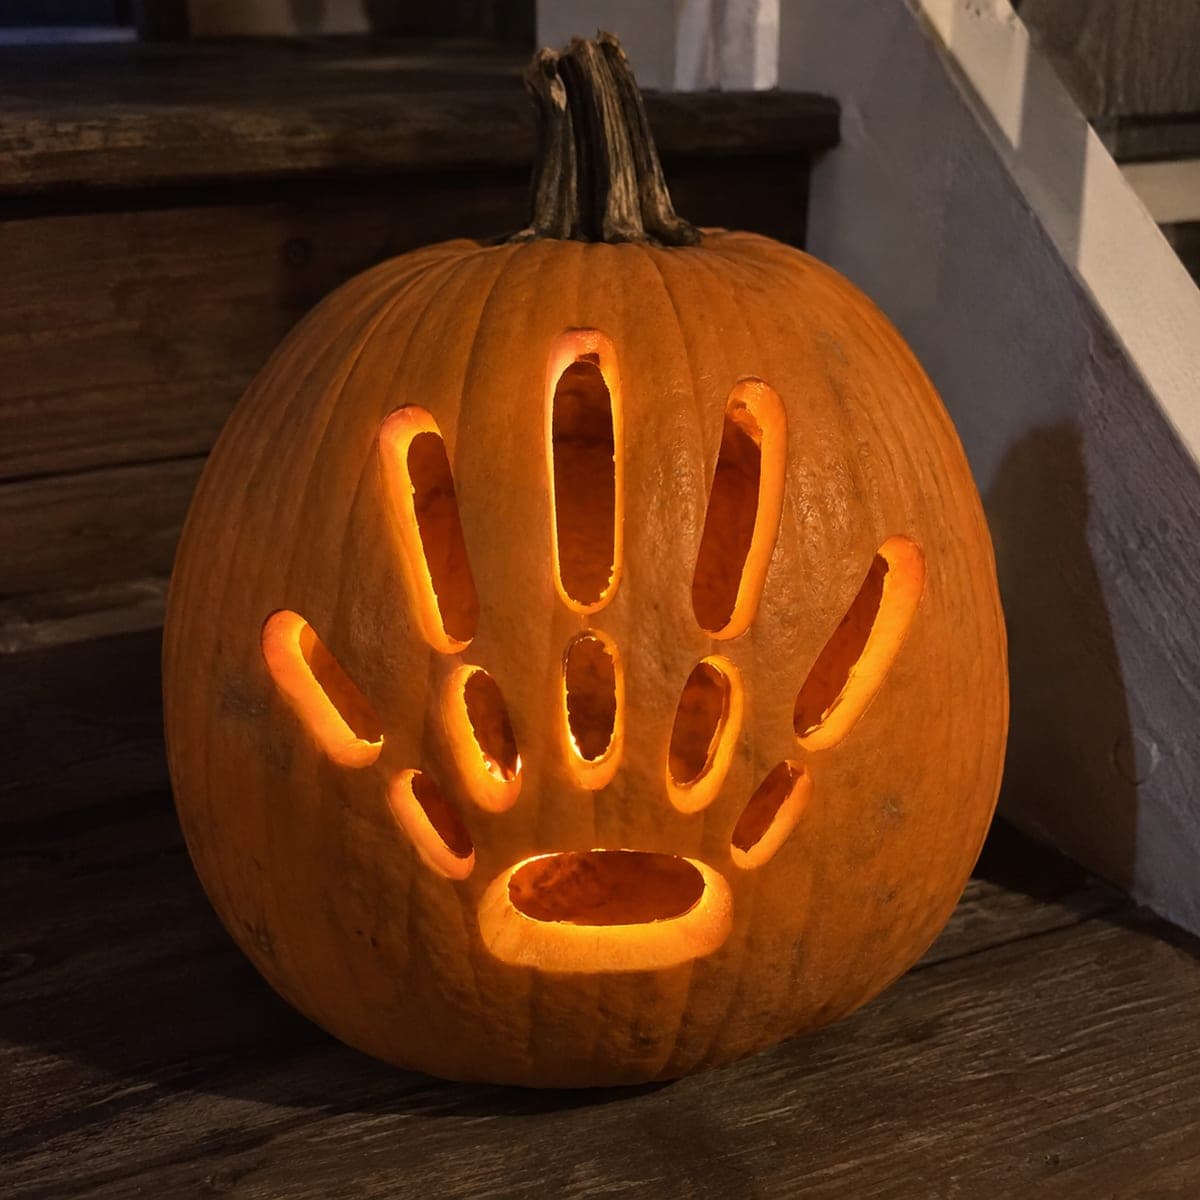
Every bone in this skeleton hands pumpkin carving is an independent through-hole, with visible finger joint segments and wrist openings cut into stone-displayed pumpkin at night. Because no continuous hand outline is retained, precise spacing between each opening is essential to keep the rind structurally sound. Use a ruler to mark bone centers before cutting, and keep each opening slightly smaller than you think you need. The isolated glow of each joint on stone at night gives this design a lifelike anatomical quality.

No ratings yet · Sign in to rate
Comments (0)

  • No comments yet — be the first.

Save without an account. Sign in to like or comment.

Our tips for carving a similar design

Because no continuous hand outline is retained, the design depends entirely on the precise spacing of independent openings to convey the hand shape. A ruler-guided layout ensures the bone centers align correctly before cutting begins, which is the difference between an anatomical result and a random collection of ovals. Keeping each opening slightly smaller than the maximum feels like restraint in the moment but prevents the rind from weakening mid-session.

From pumpkin to porch

  1. Prepare and gut the pumpkin

    Cut a base lid and scoop to half an inch. Display stone is a hard surface, so ensure the pumpkin base is flat enough to sit stably before you invest significant carving time in it.

  2. Mark bone centers with a ruler

    Use a ruler to mark the center of every planned bone opening with a small wax dot before sketching any full shape. Align these center dots to match the proportions of a real hand: fingers roughly equal length with the middle finger slightly longer. This measurement step prevents accumulated drift that makes the hand look random.

  3. Draw each bone opening around its center dot

    Draw small oval or rounded-rectangle openings centered on each wax dot. Each opening should be roughly three-quarters of an inch long for finger bones and an inch for palm and wrist bones. Leave at least three-quarters of an inch of rind between every adjacent opening.

  4. Cut larger bones first

    Start with the wrist and palm bone openings, which are the largest. Cut cleanly around each shape with a detail knife in multiple light passes. The wider palm and wrist openings are more forgiving and help you calibrate your cutting speed before moving to the smaller finger slots.

  5. Cut finger and joint segments with precise spacing

    Work through each finger from base to tip, confirming the gap between each pair of adjacent slots after every cut. If a gap feels too narrow after a cut, stop and re-evaluate the remaining finger segments before cutting more. Precision here is what gives the finished hand its anatomical quality.

  6. Light on stone at night

    Set the pumpkin on a stone surface after dark and place an LED candle inside. The isolated glow of each joint slot on the pale stone surface creates the lifelike anatomical quality described in the design concept. Photograph from slightly above to capture the stone reflection.

Written with AI to match this design

Gather your supplies

Check things off as you get ready.

Work on a stable surface, keep your free hand out of the cutting path, and have an adult handle sharp tools.

Three levels of light

  • Leave intact

    All rind between the independent bone openings forms the hand silhouette by its presence.

  • Peel & shade

    None.

  • Cut through

    Every individual bone opening including wrist, palm, all finger, and joint slots is cut fully through.

Learn the carving basics

Before you start cutting

Without a continuous hand outline, how does the design read as a hand at all?

The brain completes the hand shape from the pattern of glowing openings the same way it reads constellations as figures. As long as bone placement follows realistic hand proportions, viewers will instantly perceive a hand rather than scattered dots.

Is it risky to cut so many openings without any outline holding them together?

It is more demanding than a simple outline design because each bridge is load-bearing independently. Work methodically and check bridge widths after every cut. Stopping for two minutes between cuts to rotate the pumpkin and assess overall integrity is good practice.

My cuts are slightly ragged on the interior edge. Will that affect the glow?

Ragged interior edges scatter light sideways inside the pumpkin rather than projecting it cleanly forward through the opening. A quick pass with the flat side of a teaspoon to scrape interior edges smooth makes a visible difference in how precisely each slot glows from the front.

Your take belongs here, too.

Changed a detail? Made it simpler? Share a photo of your version and tell the community what worked.

Share your pumpkin

More pumpkins like this

You've reached the end · 8 pumpkins
The Patch Report

Fresh pumpkins, in your inbox.

The best new carvings, ideas worth stealing, and how-tos for carving season. Short, seasonal, and gone by November.

A short email during carving season. Unsubscribe anytime. See our privacy policy.