Halloween Pumpkin Carving Contest Β· Starts October 1st Β· $500 in prizes
← Back to ideas
@ai_concepts
Sep 25, 2026
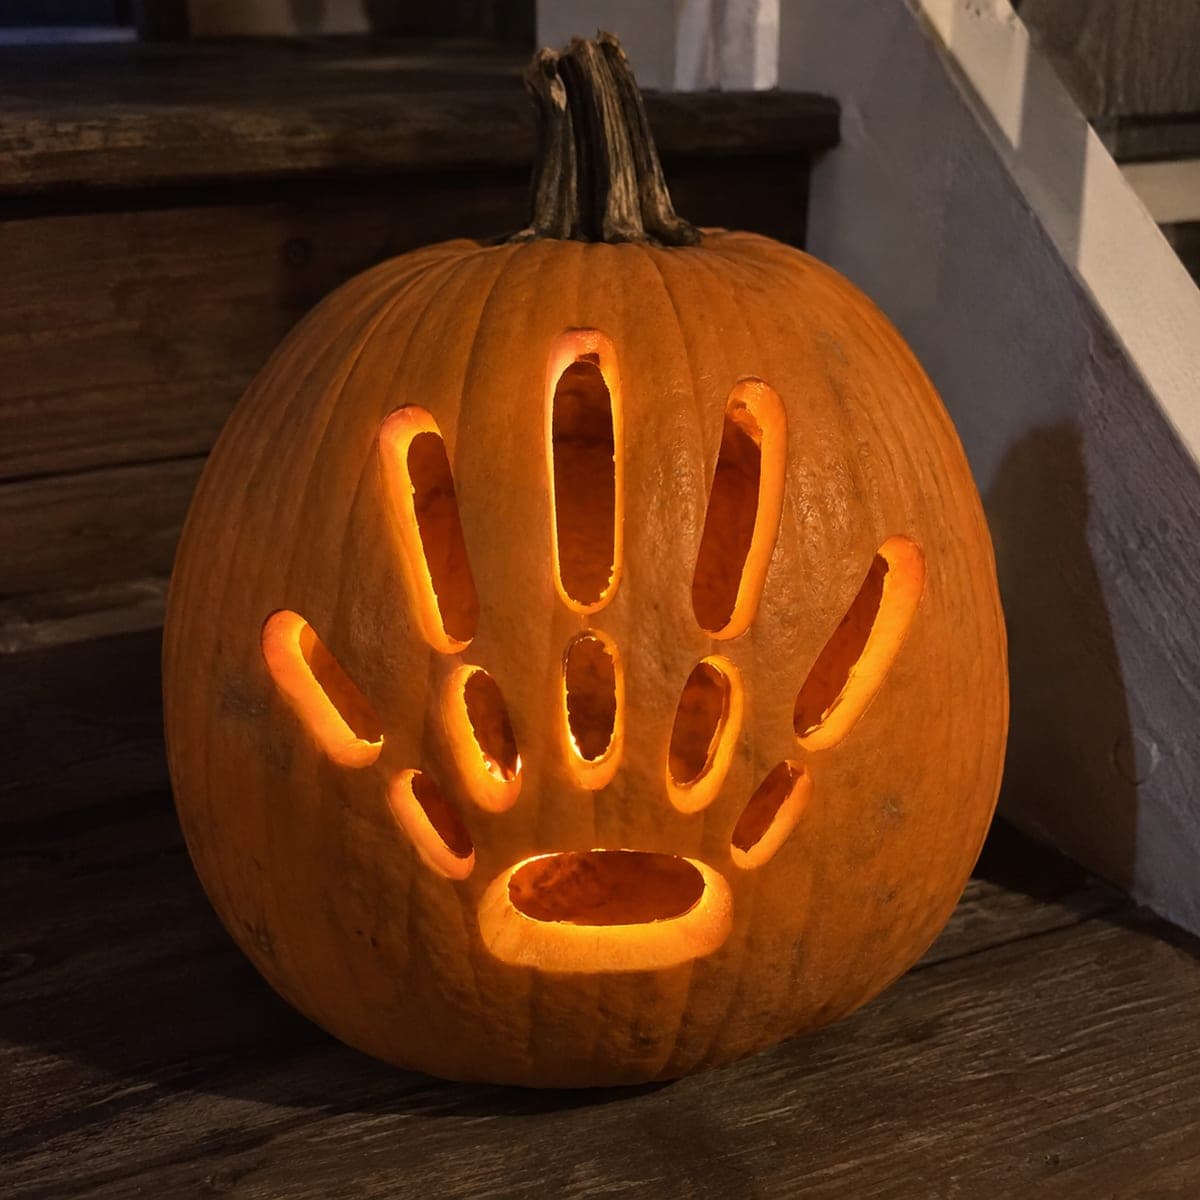
Skeleton Hand Pumpkin with Separated Palm and Finger BonesAI
0

Report this carving

Tell us what is wrong. Reports are private.

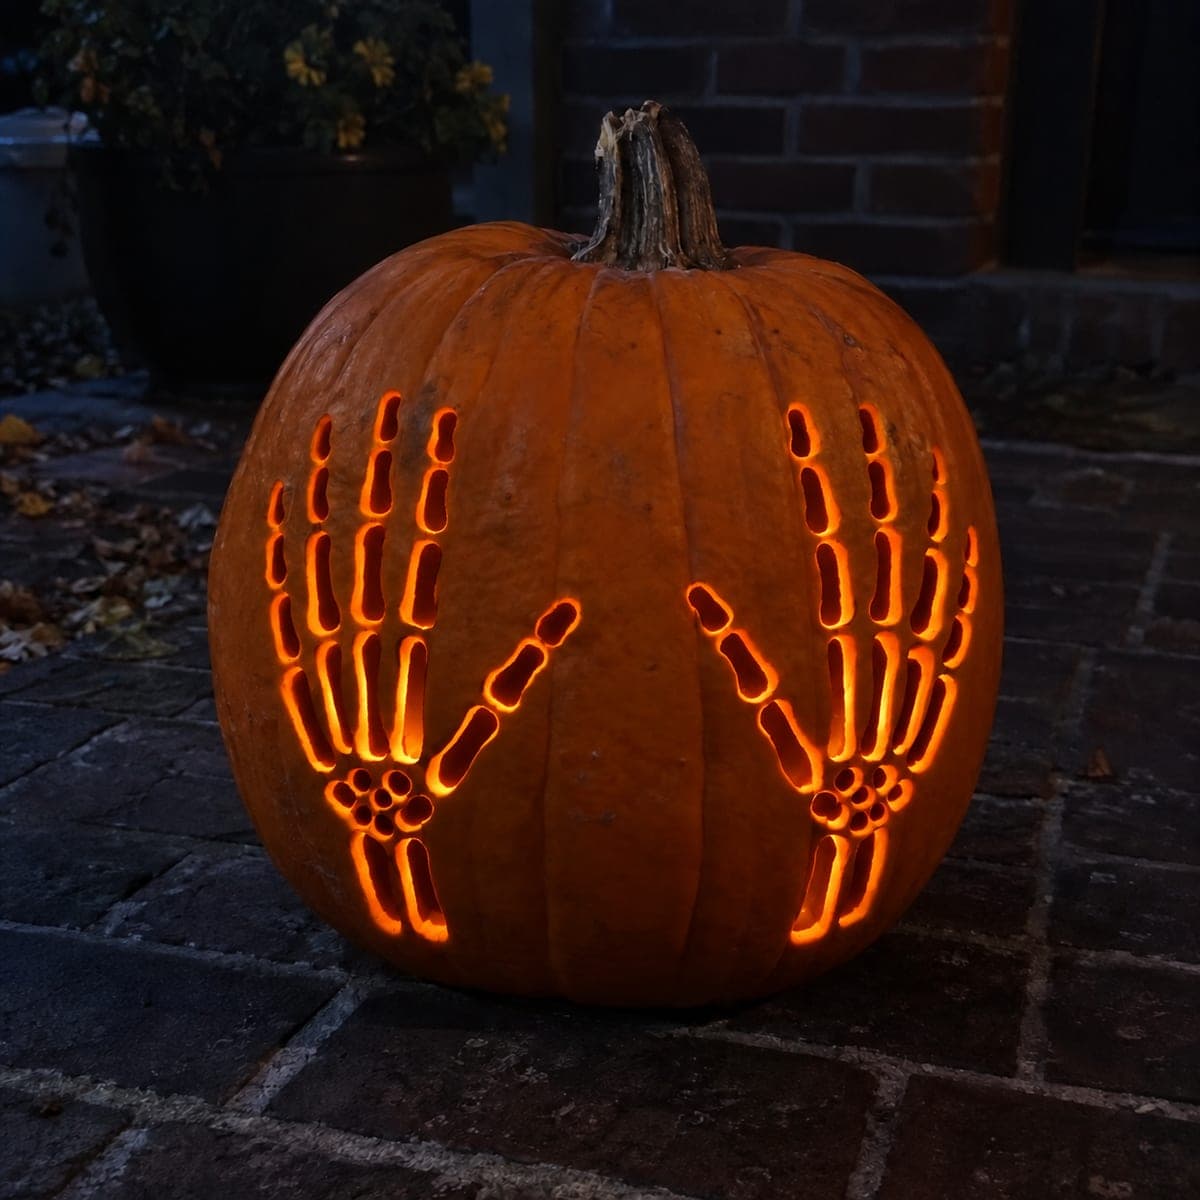
Skeleton Hand Pumpkin with Separated Palm and Finger Bones

Independent metacarpal, finger, and wrist openings spread across this skeleton hands pumpkin carving to form a recognizable skeletal hand resting on the surface. Carve the palm bones first as a stable base, then cut the finger segments moving toward the tips. Leaving broad rind connections between every pair of adjacent openings is the key to keeping this pumpkin carving idea intact through the season. Displayed on grass at dusk, the warm glow makes each bone slot read cleanly from a distance.

No ratings yet Β· Sign in to rate

Save this design for carving night, then share a photo of your own jack-o'-lantern once it's glowing.
Comments (0)

  • No comments yet β€” be the first.

Save without an account. Sign in to like or comment.

Our tips for carving a similar design

The palm bones serve as the stable base of this hand, and cutting them first before the finger segments gives you a solid foundation to work from. Broad rind connections between every pair of adjacent openings are the structural rule that keeps this carving intact through the season. The key visual quality at display distance is the complete spread of individual bones, which only reads well if each opening is clearly separated from its neighbors.

From pumpkin to porch

  1. Gut and prepare the pumpkin

    Cut a base lid and scoop to half an inch. Mark the full hand layout on the carving face before removing any rind, mapping the palm bone positions first and then the finger segments above them. The palm metacarpal shapes are wider than finger bones, so place them centrally on the face.

  2. Map and confirm bridge widths

    Check that every planned rind bridge between adjacent openings is at least three-quarters of an inch wide. Tighten any openings that would leave a bridge narrower than that. Broad bridges are the entire structural story of this design.

  3. Cut palm bone apertures first

    Cut the five metacarpal (palm bone) openings as elongated ovals working from the center outward. Use a detail knife for the curved ends and a small jab saw for the straight sides. Confirm each bridge is intact after every cut.

  4. Cut the wrist opening

    Below the palm bones, cut a single curved wrist opening that echoes the base of the palm structure. This final structural element at the base of the hand anchors the whole composition visually.

  5. Cut finger segments toward tips

    Move upward through the finger rows from base to tip, cutting each segment individually. Keep the rind bridge at each joint consistent. The smallest slots at the fingertips should still be at least three-eighths of an inch wide.

  6. Display and light on grass at dusk

    Place an LED candle inside and set the pumpkin on grass so the glow reflects off the surrounding ground for a soft ambient halo. At dusk the warm glow makes each bone slot read clearly from several yards away. Coat cut surfaces with petroleum jelly before taking it outside.

Written with AI to match this design

Gather your supplies

Check things off as you get ready.

Work on a stable surface, keep your free hand out of the cutting path, and have an adult handle sharp tools.

Three levels of light

  • Leave intact

    All rind bridges between palm bone slots and finger segments stay solid throughout.

  • Peel & shade

    None.

  • Cut through

    Wrist opening, all five palm bone apertures, and every finger segment slot are cut fully through.

Learn the carving basics

Before you start cutting

What is the difference between this design and a simpler skeleton hand?

This design separates the palm into five individual metacarpal openings rather than leaving the palm as solid rind. The extra palm openings add anatomical detail but also double the number of cuts in the busiest area of the design, which requires more patience and more careful bridge management.

Can I skip the wrist opening to keep things simpler?

Yes, the wrist opening is a finishing touch rather than a structural requirement. Skipping it makes the base of the hand look like it disappears into the pumpkin rather than a complete skeletal wrist, which some carvers prefer as a creative choice.

The palm area has five openings close together. How do I prevent the bridges from crumbling?

Cut each palm bone from the center outward rather than starting at the edges. Starting from the center means any accidental overcut runs toward empty space you have already created rather than through a bridge you need to preserve.

Your take belongs here, too.

Changed a detail? Made it simpler? Share a photo of your version and tell the community what worked.

Share your pumpkin

More pumpkins like this

You've reached the end Β· 8 pumpkins
The Patch Report

Fresh pumpkins, in your inbox.

The best new carvings, ideas worth stealing, and how-tos for carving season. Short, seasonal, and gone by November.

A short email during carving season. Unsubscribe anytime. See our privacy policy.