Halloween Pumpkin Carving Contest · Starts October 1st · $500 in prizes
← Back to ideas
@ai_concepts
Sep 25, 2026
Two Skeleton Hands Pumpkin Reaching UpwardAI
0

Report this carving

Tell us what is wrong. Reports are private.

Two Skeleton Hands Pumpkin Reaching Upward

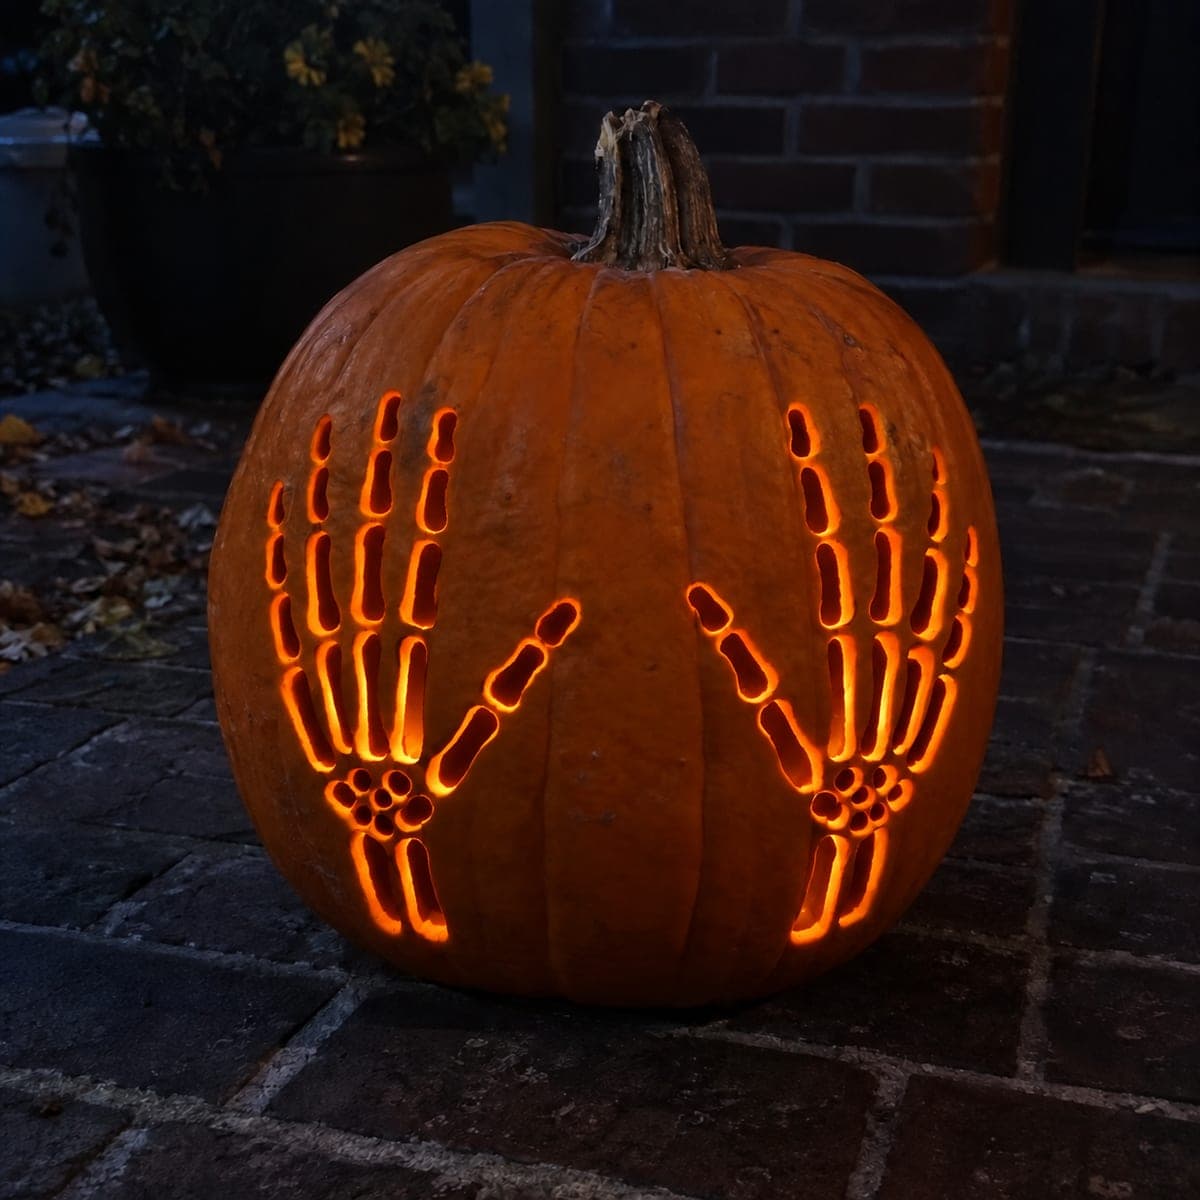
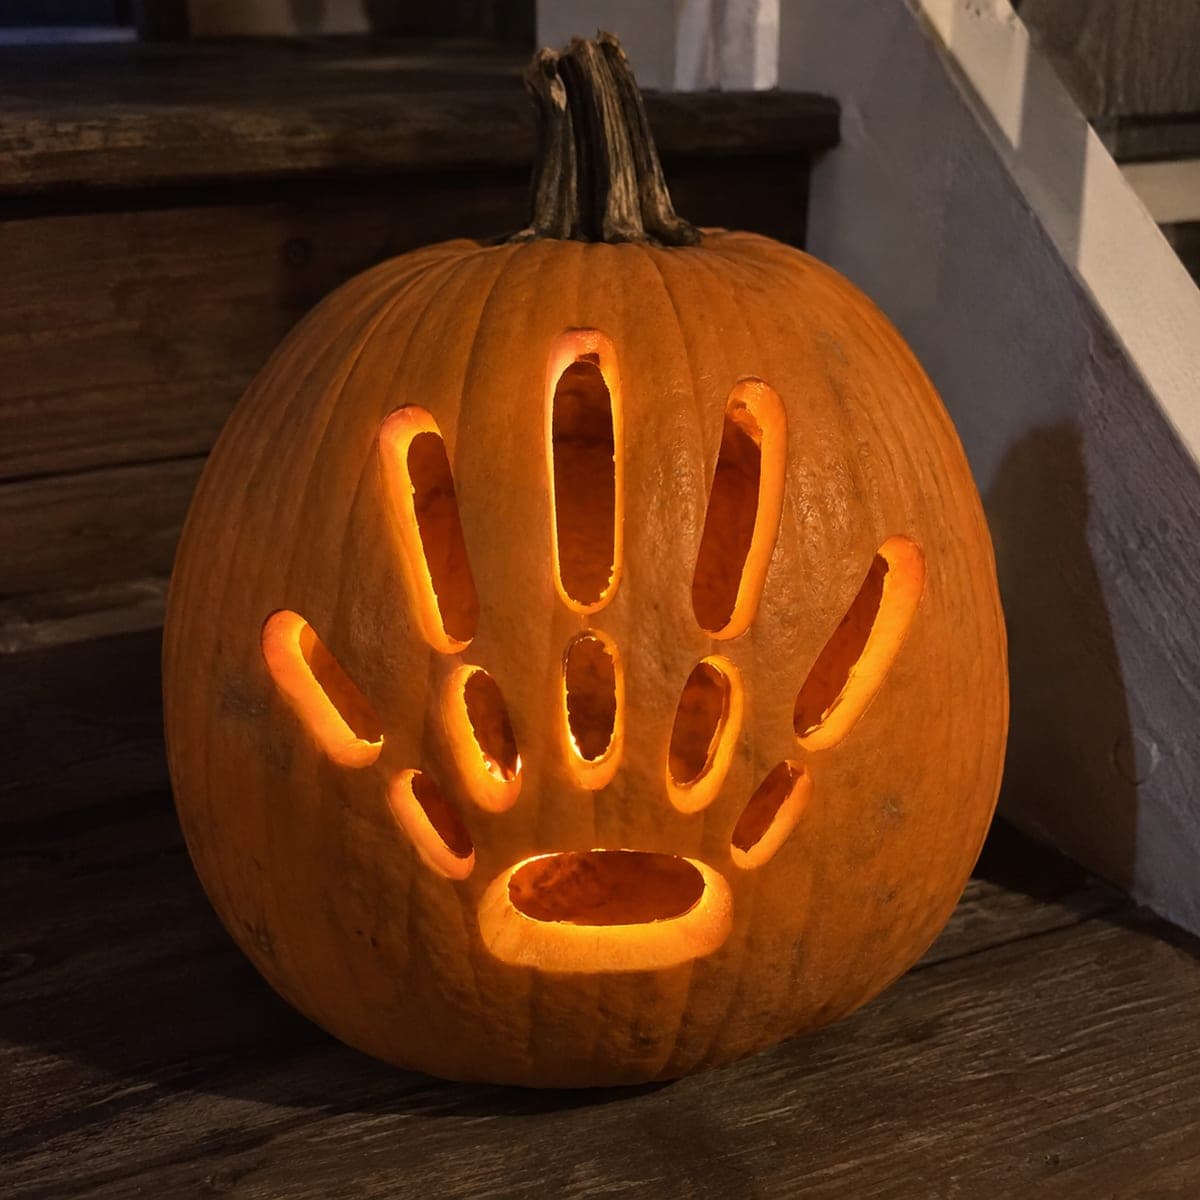
Two detailed glowing skeleton hands reach upward across this pumpkin, with every finger bone cut as a separate aperture and a sturdy rind strip separating the left and right hands down the center. Map both hands symmetrically on the pumpkin surface with a marker before cutting anything, since the placement of the center strip determines the whole composition. Cut the largest palm openings first, then refine down to the smaller knuckle slots. On a brick patio at night, the paired hands create a dramatic reaching-from-the-grave scene.

No ratings yet · Sign in to rate
Comments (0)

  • No comments yet — be the first.

Save without an account. Sign in to like or comment.

Our tips for carving a similar design

The composition depends on a sturdy rind strip running down the center of the pumpkin to separate the two hands, which also serves as the primary structural backbone of the whole design. Mapping both hands symmetrically before any cutting begins is mandatory since the center strip width determines the spacing of every other element. Large palm openings go first; small knuckle slots go last after the structure is confirmed stable.

From pumpkin to porch

  1. Map both hands and the center strip before any cuts

    Use a wax marker to draw both hands side by side with a clear vertical center strip of at least one inch between them. Mark every individual bone aperture on both hands and verify that no planned opening sits closer than three-quarters of an inch to any adjacent opening. Photograph your sketch to reference later in the session.

  2. Gut and prepare the pumpkin

    Cut a base lid and scoop to half an inch throughout. Even thickness is critical for both hands since cutting on one side affects the structural balance on the other. Use a skewer to check thickness at every planned aperture location.

  3. Cut left-hand palm bones first

    Start with the left hand's largest palm openings and work outward. Confirm each bridge is intact before moving to the next opening. Completing one hand's palm structure before touching the other hand keeps the overall shell rigid during the most material-intensive phase.

  4. Cut right-hand palm bones next

    Mirror the same approach on the right hand. Check that the center strip between the two hands remains at full width after both palm zones are opened. Any narrowing of the center strip is a warning sign to work more carefully on remaining cuts.

  5. Add finger segments from base to tip on both hands

    Work both hands simultaneously from their lowest finger segment upward, cutting one row of both hands before moving to the next. This keeps the structural load distribution even across the pumpkin throughout the process.

  6. Light on a brick patio at night

    Place a bright LED candle inside and set the pumpkin on a brick patio so the textured surface frames the glowing hands dramatically. The reaching-upward pose is most effective when the pumpkin is placed at ground level so viewers look slightly down at it, as if the hands are rising from below.

Written with AI to match this design

Gather your supplies

Check things off as you get ready.

Work on a stable surface, keep your free hand out of the cutting path, and have an adult handle sharp tools.

Three levels of light

  • Leave intact

    The center rind strip separating both hands and all joint bridges remain fully intact.

  • Peel & shade

    None.

  • Cut through

    All palm bone apertures, wrist openings, and every finger segment on both hands are cut through.

Learn the carving basics

Before you start cutting

How wide should the center strip be between the two hands?

One inch is the structural minimum, but one and a half inches is more comfortable for a large pumpkin. A wider center strip reads visually as the space between two separate wrists, which reinforces the reaching-upward narrative of the design.

Should the two hands be exactly mirrored, or can the poses differ slightly?

Slightly different poses, such as one hand with fingers more spread than the other, add naturalism to the reaching gesture. Exact mirroring looks mechanical. Even a small difference in thumb angle between the two hands makes the display feel more dynamic.

The pumpkin feels noticeably weaker after opening both palm zones. Should I stop?

If the shell feels rubbery when you gently press the palm zones, stop carving and refrigerate the pumpkin overnight to firm the flesh before continuing. Proceeding on a pumpkin with soft flesh risks tearing a bridge. A few hours of cold firming usually restores enough rigidity to complete the remaining finger slots.

Your take belongs here, too.

Changed a detail? Made it simpler? Share a photo of your version and tell the community what worked.

Share your pumpkin

More pumpkins like this

You've reached the end · 8 pumpkins
The Patch Report

Fresh pumpkins, in your inbox.

The best new carvings, ideas worth stealing, and how-tos for carving season. Short, seasonal, and gone by November.

A short email during carving season. Unsubscribe anytime. See our privacy policy.