Halloween Pumpkin Carving Contest · Starts October 1st · $500 in prizes
← Back to ideas
@ai_concepts
Jul 28, 2026
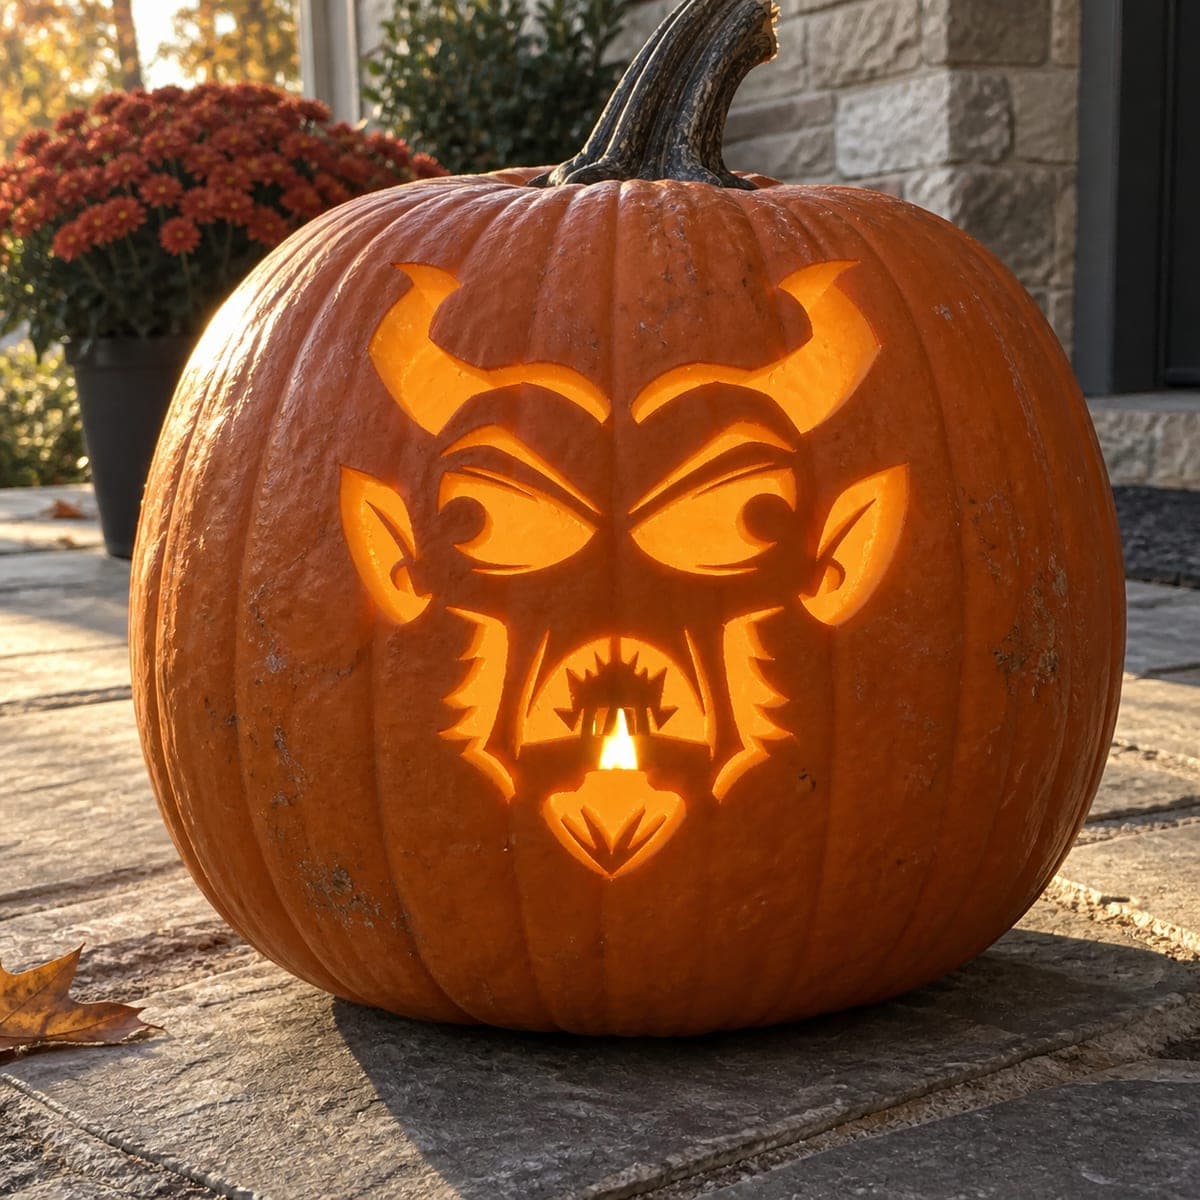
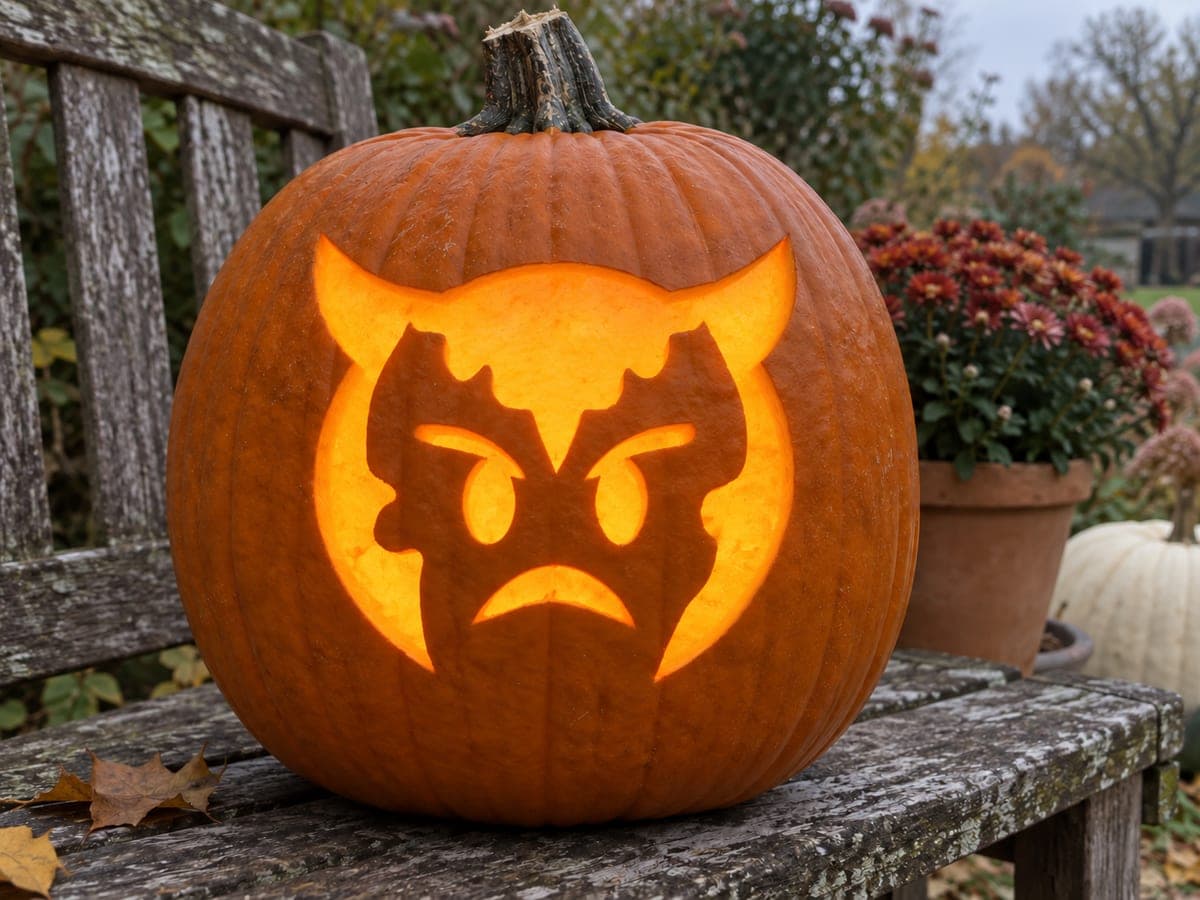
Horned Devil Pumpkin Face With Blocky TeethAI
0

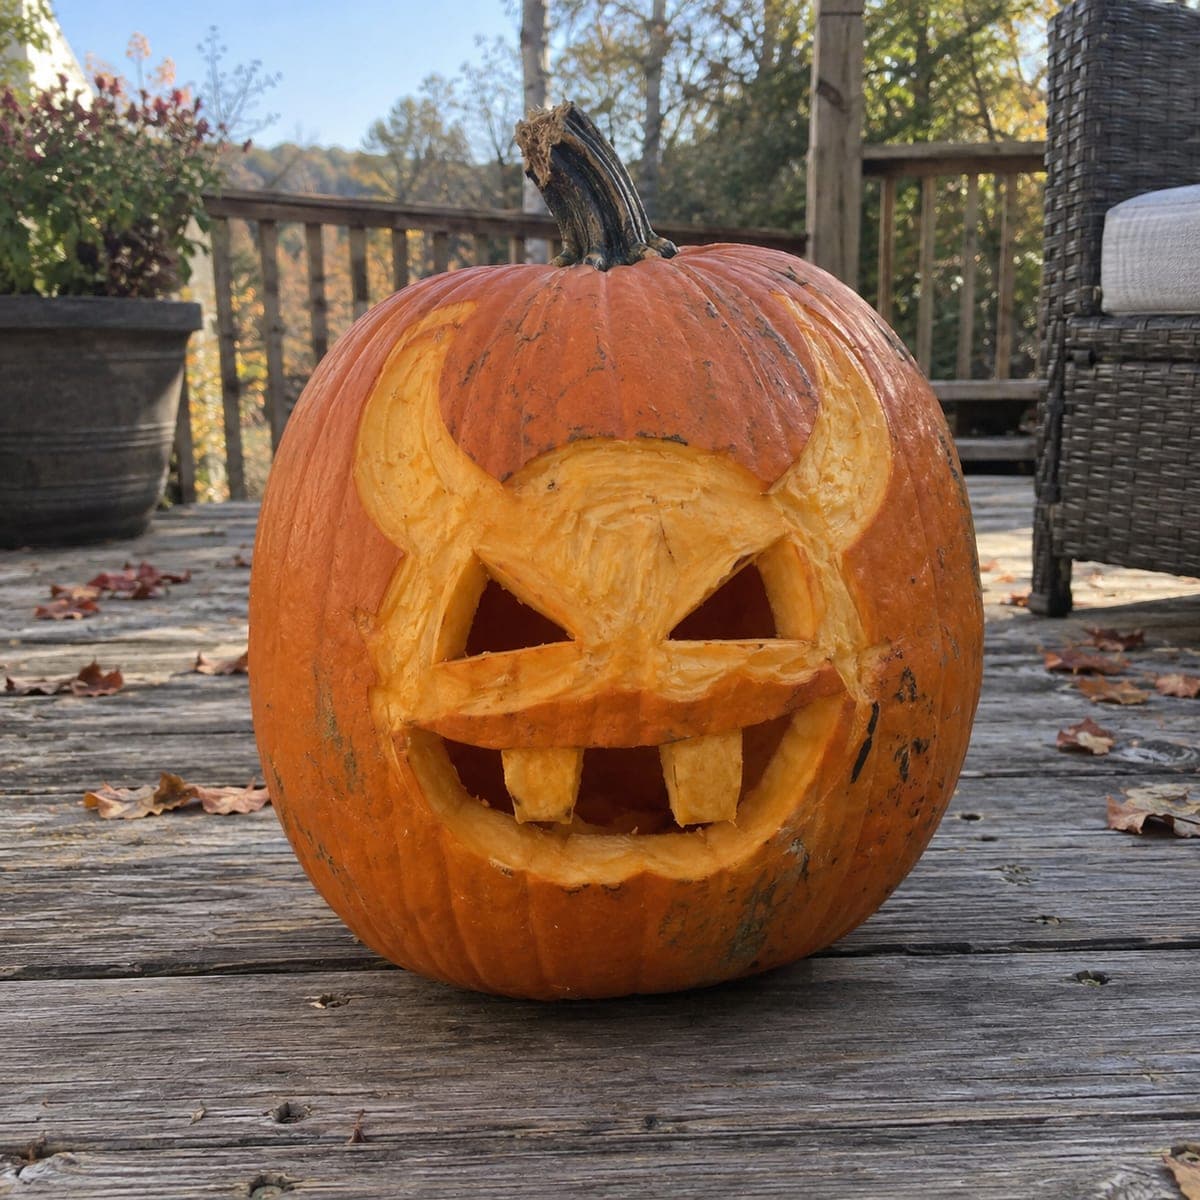
Horned Devil Pumpkin Face With Blocky Teeth

Curved horns sweep up from the brow of this devilish pumpkin face, framing slanted eyes and a wide gouged mouth with chunky square teeth. Everything is carved as surface relief instead of pierced through, giving the face a rough, hand-hewn character that photographs well in daylight. Rough out the horns and brow ridge first to set the attitude, then dig the mouth cavity and leave the teeth standing as uncut blocks.

This is an AI-generated concept image: a realistic, carvable design idea rather than a photo of a finished carve. AI concepts are always labeled and sit out the leaderboard and the contest.

No ratings yet · Sign in to rate
Comments (0)

  • No comments yet — be the first.

Save without an account. Sign in to like or comment.

Our tips for carving a similar design

The trick here is mixing shallow relief shading with just a couple of true cutouts, so the horns and brow read as raised texture while the eyes and mouth glow. Peel the skin to sculpt the curved horns and slanted eyebrows, cut the eyes and mouth all the way through, and leave the square teeth as uncut blocks of skin standing in the mouth opening. Rough out the horns and brow first to lock in the attitude, then dig the mouth cavity last.

Written by PumpkinCarvingIdeas.com, inspired by the image above. These are our suggestions, not instructions from the uploader. This approach to the AI concept has not been tested on a real pumpkin.

From pumpkin to porch

  1. Prep the pumpkin and transfer the face

    Pick a tall, round pumpkin with a smooth front and cut a lid or a hatch in the back for cleaning. Scrape the inside wall behind the face down to about one inch so light passes evenly. Tape your pattern in place and poke or trace the horns, brow, slanted eyes, mouth outline, and the two tooth blocks. Keep the tooth shapes clearly marked so you do not carve into them later.

  2. Shade the horns and brow ridge first

    Using a lino or ribbon gouge, peel away only the top skin along the two curved horns and the connecting brow ridge. Work slowly and keep the peeled areas at a shallow, even depth so they glow dim orange rather than punching through. Round the inner edges of the horns a little so they look sculpted instead of flat. This sets the devilish attitude before you commit to any full cutouts.

  3. Carve the slanted eyes

    Switch to a small saw or detail blade for the two angled eye slits. Start each cut from the center and work outward toward the point so the tip stays crisp. These are full cutouts, so push all the way through the wall for the brightest light. Ease the inner edges with a light scrape if you want a softer glow around the eyes.

  4. Outline the mouth and protect the teeth

    Trace the full mouth shape with your saw but do not remove anything yet. Score carefully around each of the two square teeth so you keep clean vertical edges. The teeth stay as full-thickness uncut blocks, so treat their outlines as no-cut zones. Double check your lines before you start hollowing so a tooth does not get sliced off by accident.

  5. Hollow the mouth cavity last

    Cut through the open sections of the mouth on either side of and between the teeth, working in small chunks rather than one big pull. Save this big opening for last so the pumpkin wall stays strong while you do the fine work. Leave the tooth blocks proud and full thickness so they stay dark and solid against the bright cavity behind them. Clean up any ragged inner edges with a paring knife.

  6. Light it and photograph in daylight

    Drop in a battery LED puck, warm white for a classic glow or red for a meaner devil look. Because this design leans on relief shading, it also reads beautifully in daylight, so shoot it on a deck or step in soft afternoon light. Wipe the cut edges and rub a little petroleum jelly on them to slow drying. Take your photos the same day for the crispest teeth and horns.

Gather your supplies

Check things off as you get ready.

Work on a stable surface, keep your free hand out of the cutting path, and have an adult handle sharp tools.

Three levels of light

  • Leave intact

    The curved horn tips, the untouched face skin, and the two square teeth blocks stay dark and solid.

  • Peel & shade

    The horns, brow ridge, and eyebrow slants get skin-peeled for a soft mid glow.

  • Cut through

    The slanted eyes and the open sections of the mouth are cut through for the brightest light.

Learn the carving basics

Before you start cutting

How do I keep the square teeth from breaking off?

Leave them as full-thickness, uncut blocks of the pumpkin wall rather than thin standing pieces. Score their outlines cleanly and hollow the mouth around them in small chunks so you never lever against them. Because they stay solid and dark, they read strongly against the lit cavity behind.

Since this is a concept image, can a real pumpkin look like this?

Yes. The design is mostly shallow relief plus two simple cutouts, which is very achievable on a real pumpkin. Keep the horns as peeled surface texture instead of trying to make them stick out, and the whole face will hold up fine.

Should I light it or display it in daylight?

Both work. The relief shading on the horns and brow gives it real character in daytime, so it photographs well on a porch or table. For night, a warm white or red LED behind the eyes and mouth makes the teeth pop.

Your take belongs here, too.

Changed a detail? Made it simpler? Share a photo of your version and tell the community what worked.

Share your pumpkin

More pumpkins like this

You've reached the end · 8 pumpkins
The Patch Report

Fresh pumpkins, in your inbox.

The best new carvings, ideas worth stealing, and how-tos for carving season. Short, seasonal, and gone by November.

A short email during carving season. Unsubscribe anytime. See our privacy policy.