Halloween Pumpkin Carving Contest · Starts October 1st · $500 in prizes
← Back to ideas
@ai_concepts
Sep 25, 2026
Retained Witch Hat Cat in Arch Window Pumpkin CarvingAI
0

Report this carving

Tell us what is wrong. Reports are private.

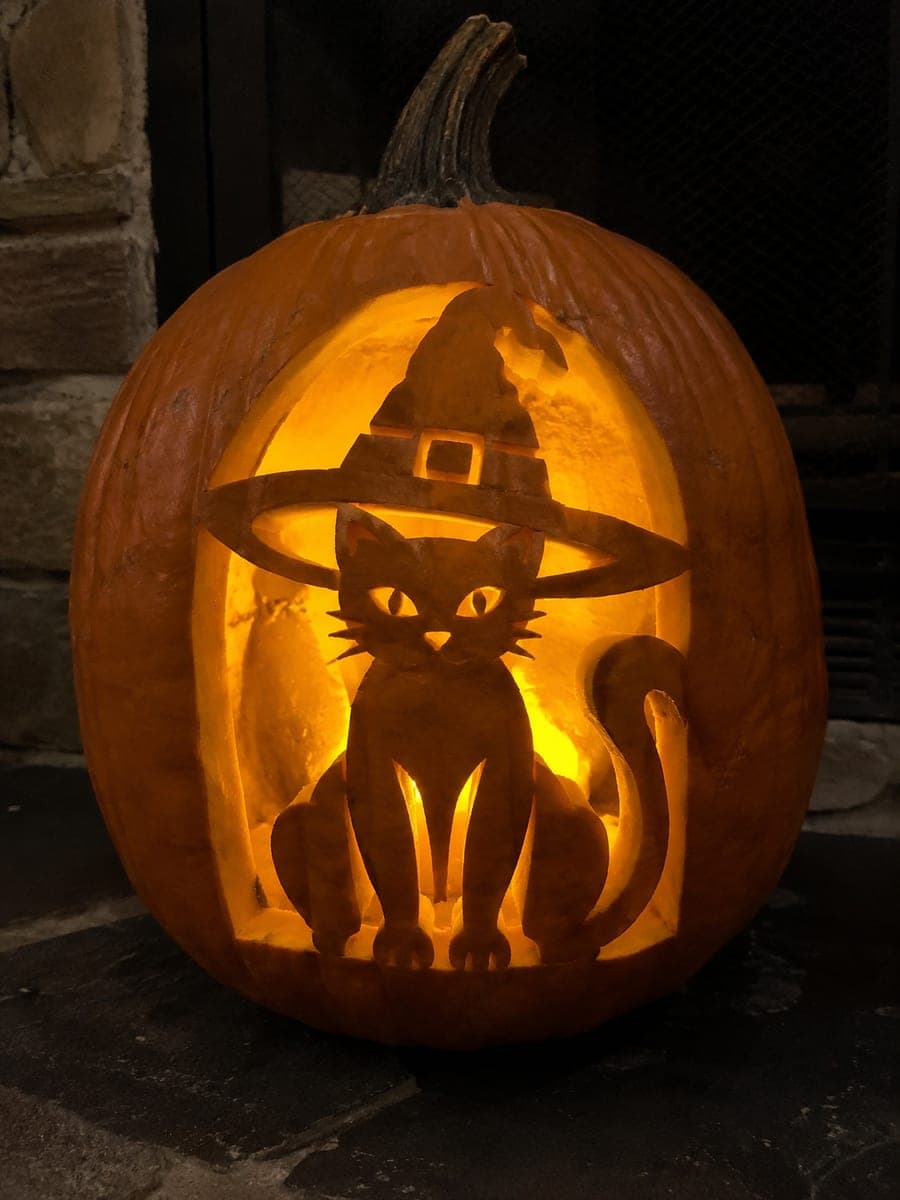
Retained Witch Hat Cat in Arch Window Pumpkin Carving

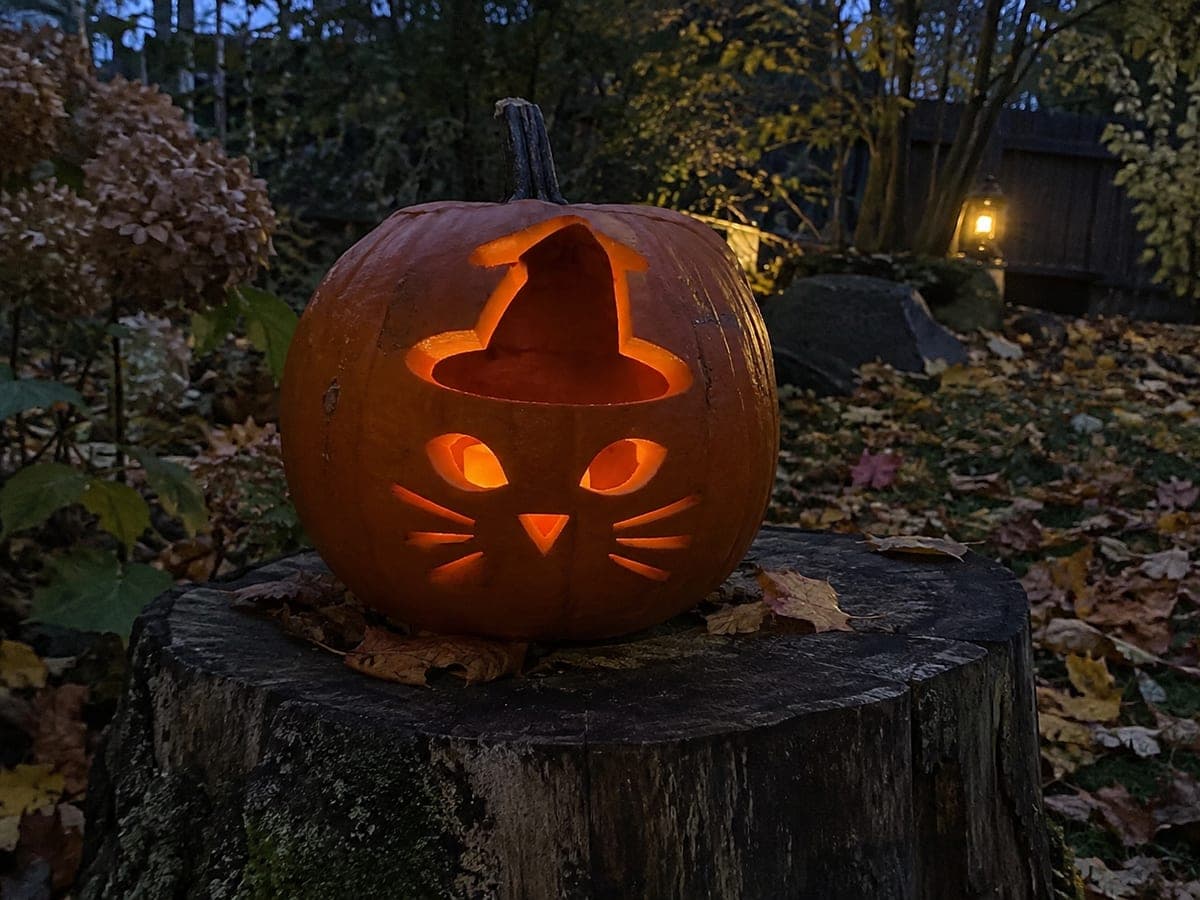
A sitting cat wearing a broad crooked witch hat is retained inside an arch window, with wide haunches and paws anchoring the base, the hat brim connecting both sides of the arch and the hat tip joining the top of the frame in this hard cat with witch hat pumpkin carving. Eye apertures and a shallow back-carved buckle detail add face and hat character without cutting through any of the main structural bridges. Cut the arch opening first, then work the cat and hat outline from the widest attachment points up to the narrowest.

No ratings yet · Sign in to rate

Comments (0)

  • No comments yet — be the first.

Save without an account. Sign in to like or comment.

Our tips for carving a similar design

The arch window is the outer frame and the sitting cat with hat is the retained shape inside it. The hat brim connecting both sides of the arch and the tip joining the top are the key load-bearing bridges, along with the wide haunches and paws at the base. Cutting from the widest attachments upward keeps the retained piece stable throughout the process.

From pumpkin to porch

  1. Hollow and prep

    Cut access from the back and scrape the interior to a consistent inch of thickness across the full arch area. An even wall thickness is especially important here because the retained cat silhouette needs uniform support around all its connection points.

  2. Transfer the full design

    Tape the arch-window template to the pumpkin and poke-transfer every line: the arch border, the cat-and-hat outline inside it, the eye apertures and the buckle area. Mark which regions will be removed as background and which will stay as the retained cat. It helps to lightly shade the background sections with a marker before cutting.

  3. Cut the arch border

    Use a detail saw to cut the outer arch opening first, establishing the frame. Work the curved top of the arch smoothly so the rind does not crack at the apex. The arch opening provides the structural context for every cut that follows.

  4. Remove background sections

    Cut away the background areas around the cat body and hat, leaving the haunches, paws, brim and hat tip attached to the frame. Remove the smallest background sections first and work toward the largest to keep the shell rigid as long as possible.

  5. Cut the eye apertures and back-carve the buckle

    Cut the small eye holes through completely. For the buckle, use a detail knife to shave away the top rind layer only, removing just enough depth to create visible contrast without cutting through. Score lightly and check depth frequently.

  6. Light and display

    Place a warm LED candle inside and check that all background sections glow while the retained cat stays shadowed. Position the pumpkin on a slate surface or dark shelf so the arch frame reads clearly from across the room.

Written with AI to match this design

Gather your supplies

Check things off as you get ready.

Work on a stable surface, keep your free hand out of the cutting path, and have an adult handle sharp tools.

Three levels of light

  • Leave intact

    The retained cat and hat silhouette, which stays dark against the glowing background

  • Peel & shade

    The shallow buckle area on the hat, which shows slight surface contrast

  • Cut through

    All background sections within the arch window, which glow fully from behind

Learn the carving basics

Before you start cutting

Which bridge is the most critical to protect?

The hat brim connecting both sides of the arch is the most important horizontal bridge. Keep it at least a centimeter and a half wide at each wall contact and never undercut it from below. The hat tip joining the top is the second priority.

How do I keep the eye apertures from making the cat face look fragile?

Keep the eyes small relative to the head area and preserve a rind strip both above and below each eye. The eyes are purely decorative detail holes and do not need to be large to read well when lit.

Can I simplify the design by skipping the buckle detail?

Yes. Leaving the buckle area as solid rind does not affect the structural integrity and the design still reads clearly. The back-carved buckle is a refinement you can add last once the main carving is complete and stable.

Your take belongs here, too.

Changed a detail? Made it simpler? Share a photo of your version and tell the community what worked.

Share your pumpkin

More pumpkins like this

You've reached the end · 8 pumpkins
The Patch Report

Fresh pumpkins, in your inbox.

The best new carvings, ideas worth stealing, and how-tos for carving season. Short, seasonal, and gone by November.

A short email during carving season. Unsubscribe anytime. See our privacy policy.